

Creating a Dub
Create a new dub in two steps - upload your source file, then add your dubbing details - and track it through processing. For an overview of what Dubbing does and who it’s for, see the Dubbing overview.
Step 1: Upload Your Source File
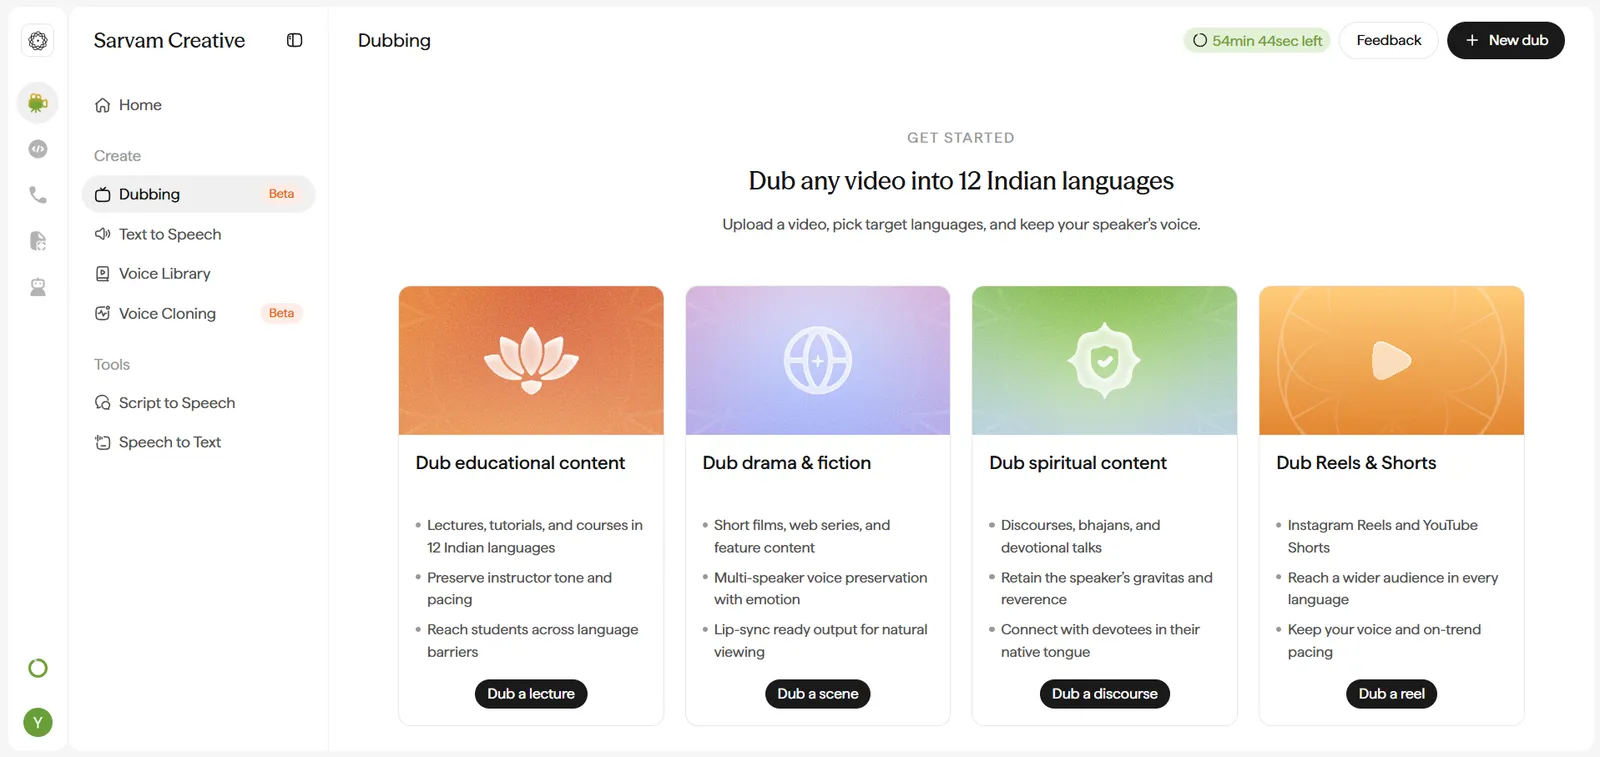
Start a New Dub
Click + New dub in the top-right corner, or click one of the category card buttons on the landing page (Dub a lecture, Dub a scene, Dub a discourse, Dub a reel) to open the “Create a dub” modal.
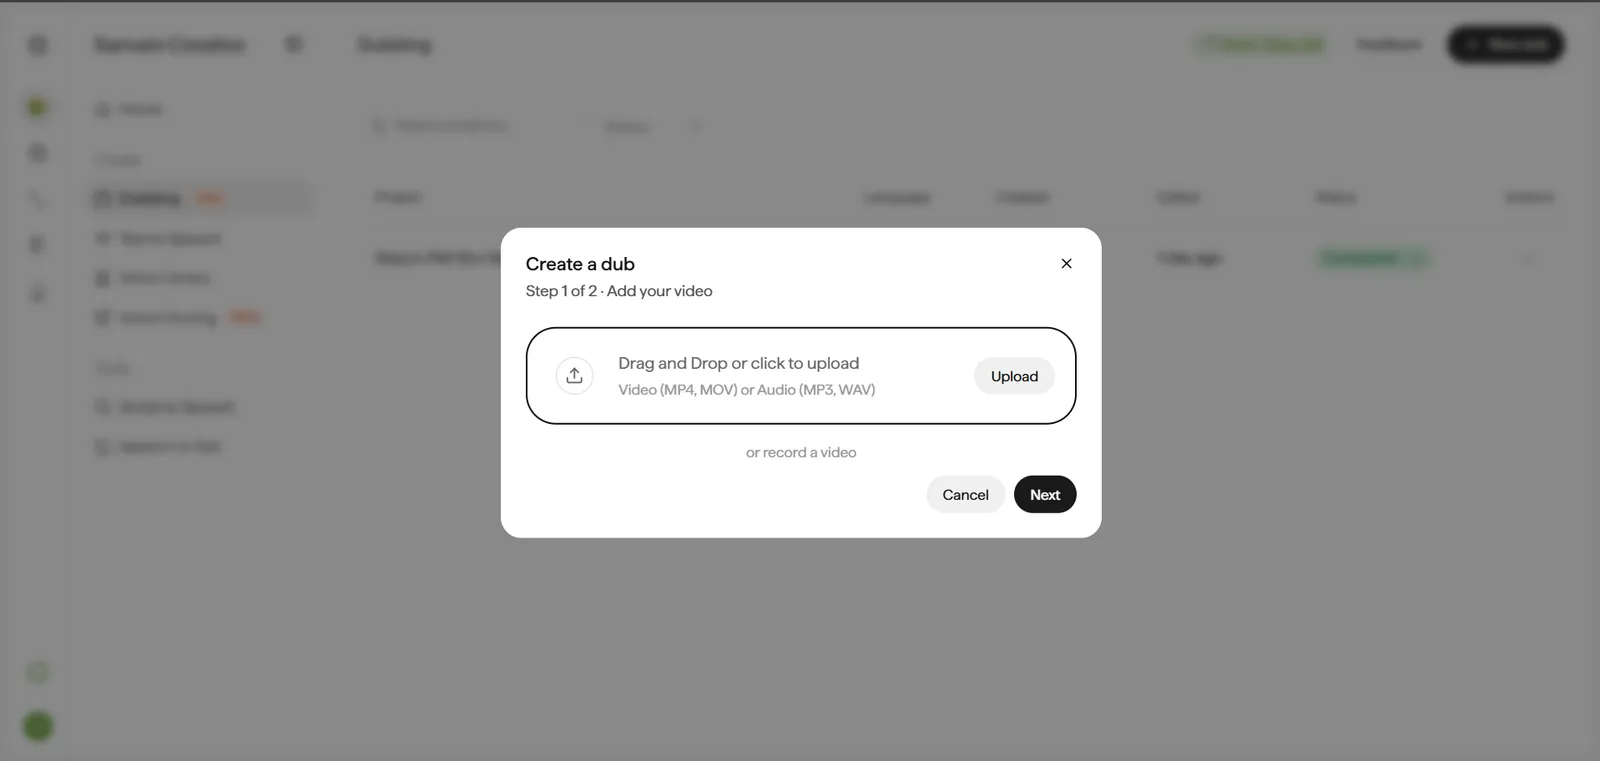
- The dropzone accepts video (MP4, MOV) or audio (MP3, WAV) - or click or record a video to capture footage directly instead of uploading a file.
Provide Your Source File
Upload a video or audio file, or attach an accessible social URL.
- Uploads are capped at 2 GB per file.
- A URL link skips the local download-then-upload round trip for content you’ve already published (e.g. a YouTube or social link).
- The modal displays your uploaded file’s name, size, and duration once attached (e.g. “165.2 MB · 5:16”) before you move to the next step.
Step 2: Add Dubbing Details
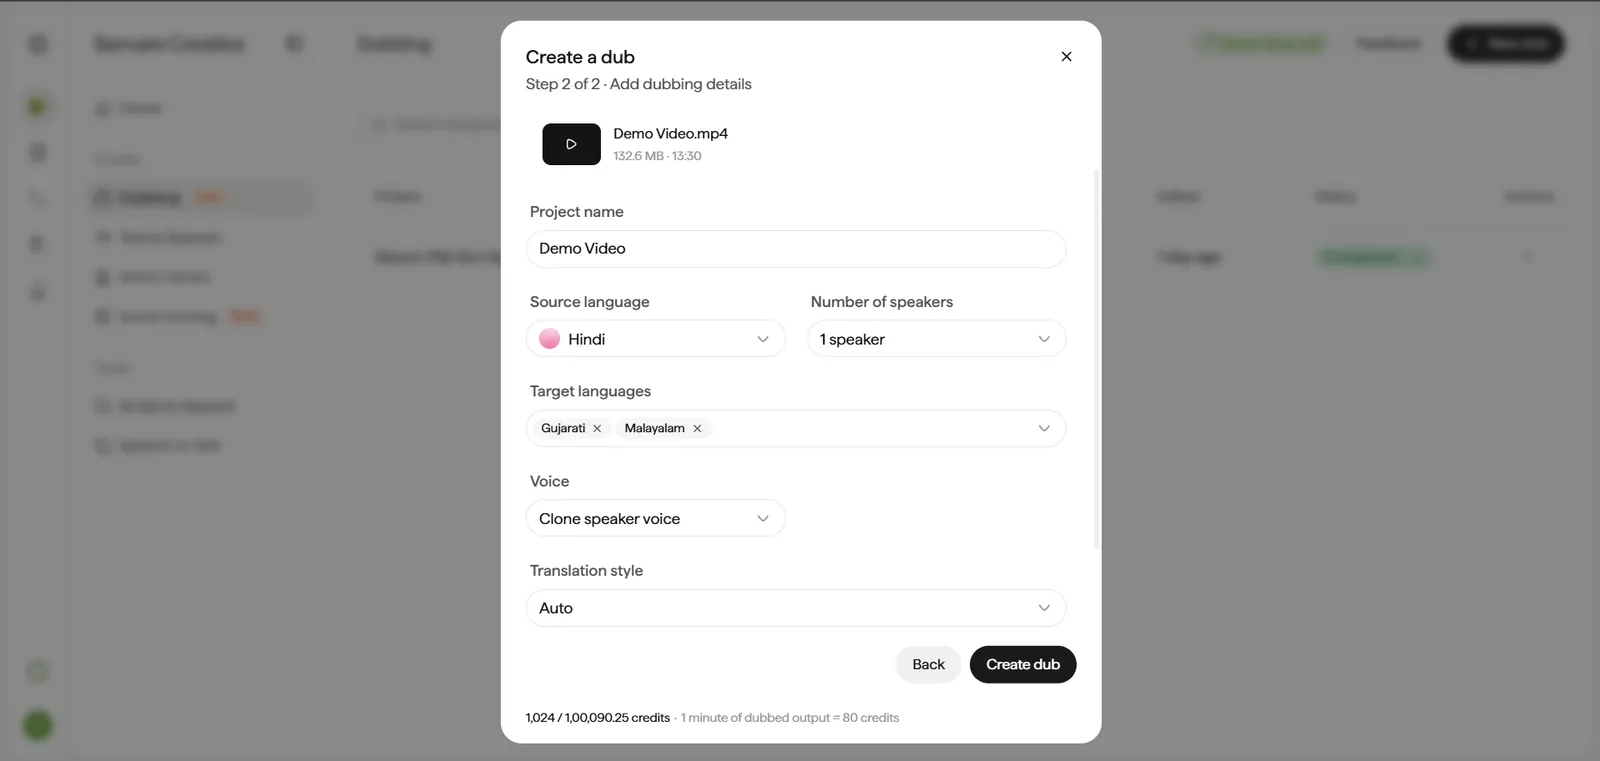
Name Your Project
The Project name field is pre-filled from your source filename - edit it to something you’ll recognize later, especially if you’re running several dubs at once.
Set the Source Language
Search or scroll the Source language dropdown and select the language actually spoken in your file.
- Each language shows a colored icon alongside its name, making the list easy to scan visually as well as by search.
- This tells the model which phonemes and speech patterns to expect, which affects transcription and speaker-separation accuracy before translation even starts.
Select the Number of Speakers
Choose a count from the Number of speakers dropdown (1, 4, 5, 6, 7, 8, and more on scroll).
- Round upward for multi-speaker conversations - undercounting is worse than overcounting.
- Merging two distinct speakers into one slot blends their voices in the output, which is much harder to fix in the editor than simply merging an unused extra slot.
Select Your Target Languages
Add as many languages as you need to the Target languages field. Each one appears as a removable tag (with an x), and the dropdown stays open to add more.
- Real-world usage skews heavily toward Hindi and Telugu, with the full set covering most major Indian languages plus English.
- Adding multiple targets in one pass produces several localized versions from a single upload - no need to re-process the source per language.
Match Speaker Strategy to Your Use Case
Choose how the dubbed voice should be generated from the Voice dropdown:
- Clone speaker voice - zero-shot vocal trait tracking. Use this when audience recognition of the original speaker matters (a host, a founder, a recurring instructor). This is the default.
- Use Sarvam voices - native artist personas. Faster to review since the persona is already familiar and consistent across projects.
Set the Translation Register
Choose a style from the dropdown, or leave it on Auto:
- Auto - automatically picks the best style for the content. Default.
- Formal - polished, professional language for official content.
- Urban colloquial - modern, trend-aware localization with urban phrasing and idioms.
- Standard colloquial - everyday spoken language that feels natural without being overly trendy.
- Traditional colloquial - conventional spoken language that preserves local linguistic and cultural nuance.
- Style changes register and word choice, not just vocabulary - a serious lecture translated in
Urban colloquialstyle will read as too casual, even if every fact is correct.
Submit for Processing
Click Create dub to dispatch the file to the localization pipeline.
- If the banner reads “The video is fully free,” this dub won’t draw against your free minutes or credits.
- Setup fields lock once submitted - double-check source language and speaker count first, since fixing them afterward means starting a new dub rather than editing this one.
Track Progress
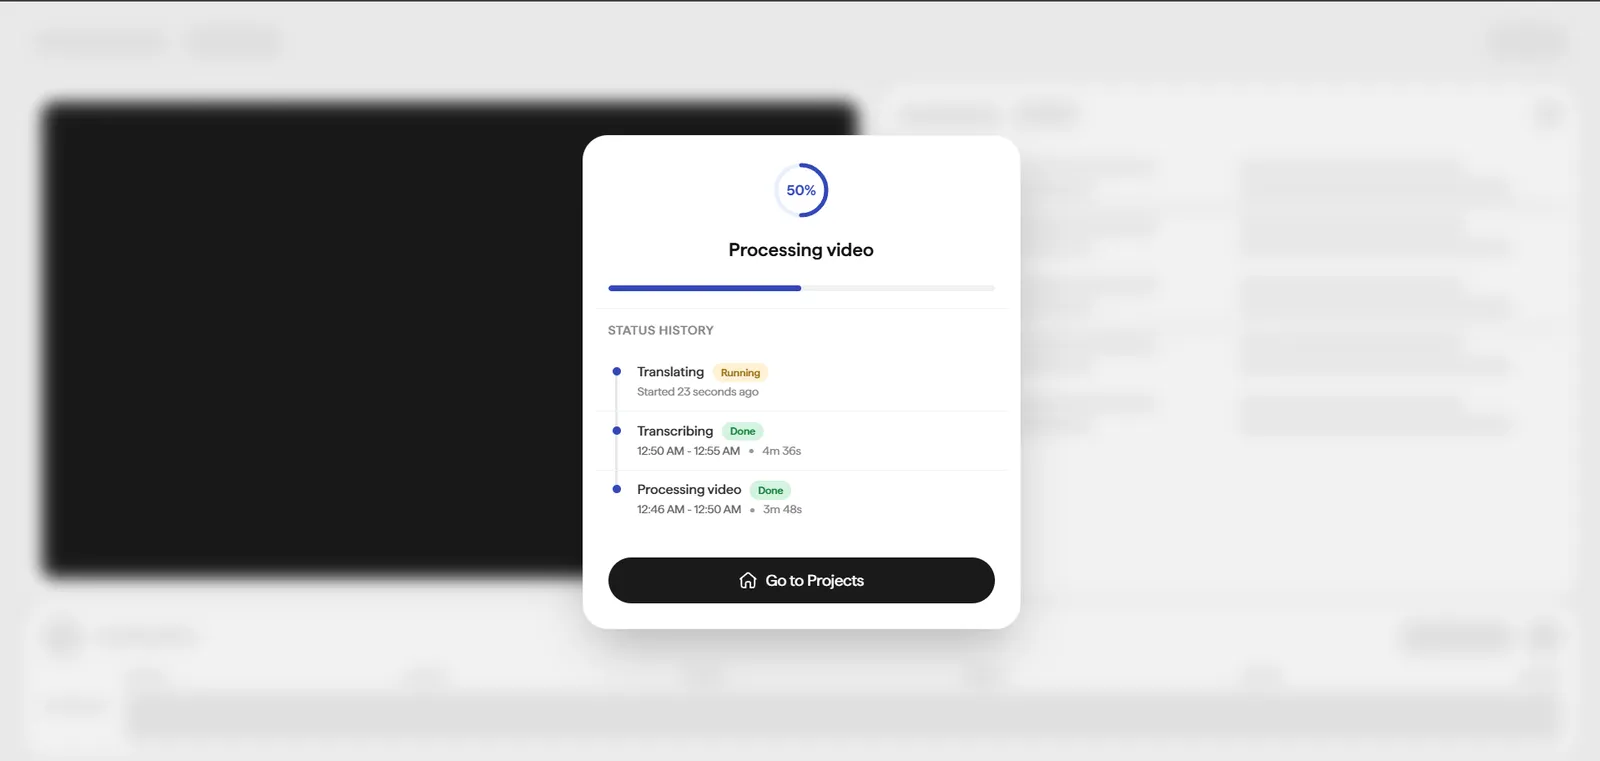
After you click Create dub, a processing dialog opens automatically so you can track progress at every stage instead of waiting on a blank screen.
- The Status History timeline shows each pipeline stage in order (processing video, transcribing, translating, and so on) as it runs, with a
RunningorDonetag and how long each stage took. - You don’t have to wait on this screen. Click Go to Projects to navigate away - the dub keeps processing in the background, and the project will show as “Review Ready” once it’s done.
Once your dub reaches “Review Ready” status, head to Editing a Dub to refine it.