

Classify documents
Classify tells you what kind of document each file is. You define the document types, for example Bank statement, Identity document, or Invoice. Sarvam assigns one to each file and gives a confidence score and a short reason.
Use it to route incoming documents to the right team, check that a customer uploaded the right paperwork, or pick the right Extract schema for each file.
Step 1: Add your documents
Click Classify under Products in the sidebar. Drag and drop your files, click Upload documents, or pick a demo document (Bank statement.pdf or PAN card.pdf).
Accepted formats: PDF, JPEG, PNG, TIFF, ZIP. Each run takes up to 10 files or 20 pages in total. For more, use the Classify API.
Step 2: Define document types
Under Define document types, add one row per type:
- Document type. The label you want back, for example Identity document.
- Description. What this type looks like, for example A PAN card, Aadhaar card or passport. Clear descriptions make a big difference when two types look alike.
Click + Add type for more rows, drag the handle to reorder, and click × to remove one. Switch to JSON to edit the list as raw JSON, or use Load saved list to reuse types from a saved Config.
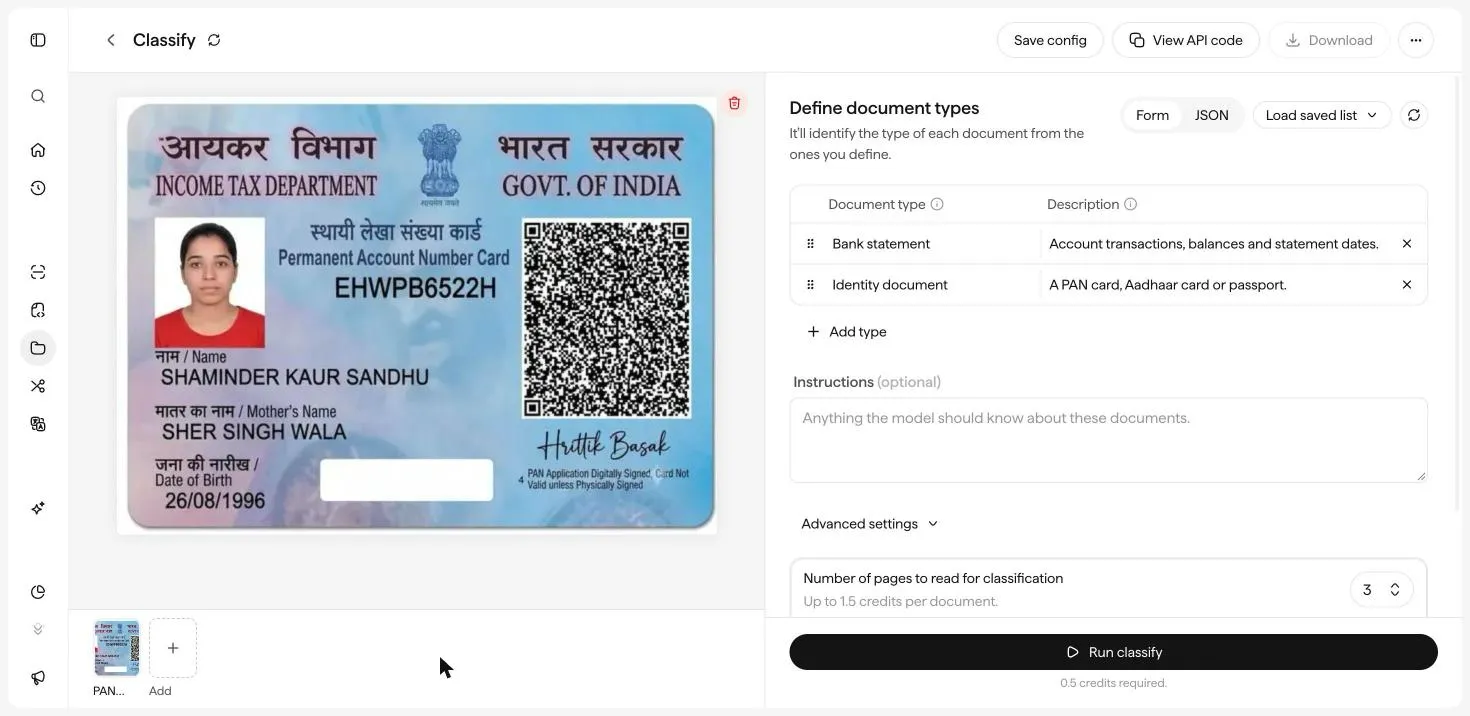
Use the optional Instructions box for anything that applies to every document.
Advanced settings
Expand Advanced settings to control cost and behaviour:
Step 3: Run and review
Click Run classify. The credits needed are shown under the button. When the run is Done, the Output tab shows one row per document:
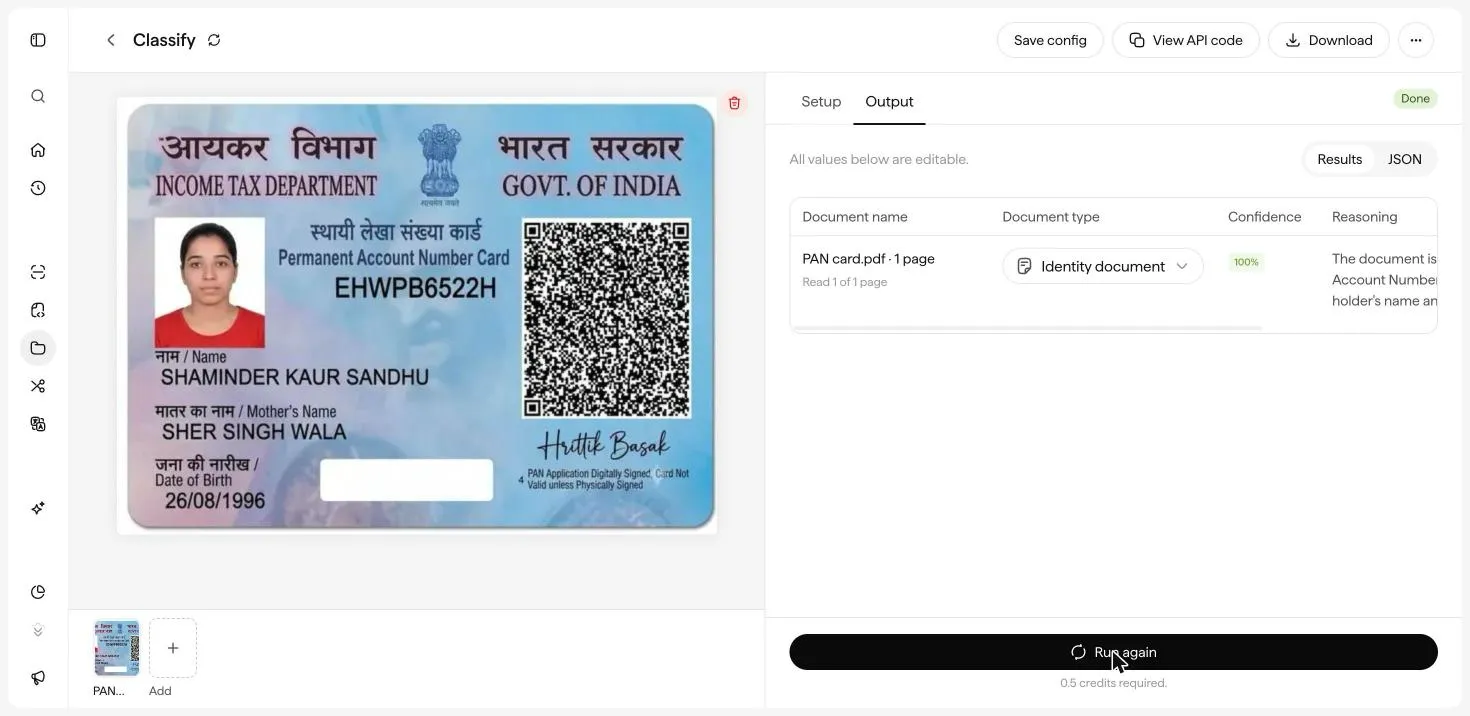
Switch to JSON to see the raw output. Go back to Setup to change the types and Run again.
Step 4: Download or reuse
- Download saves the results.
- Save config saves your document types and settings for reuse. See Save and reuse Configs.
- View API code gives you cURL, Python, or JavaScript for the Classify API.
Classify looks at each file as a whole. If one PDF contains several different documents, use Split instead. Split finds where each document starts and ends.
Next: Split a document bundle.