
Connect Exotel to an AI voice agent
Connect your Exotel account to Voice Agents for inbound and outbound voice calling.
Setup has two parts: add your Exotel credentials on Voice Agents, then configure the call flow on Exotel’s dashboard.
Before you start: an active Exotel account with admin access to its dashboard, at least one Exophone (Exotel’s term for a virtual phone number), and Voice Agents access with permission to add telephony connections (Deploy → Phone Numbers).
Watch the setup
Add the connection on Voice Agents
Voice Agents needs four values from your Exotel account - the Account SID, API Key, API Token, and Base URL. Get them from the Exotel dashboard, then enter them on Sarvam.
Get your Account SID (on Exotel)
In the Exotel dashboard, go to Settings → API Settings and copy the Account SID.
Get your API Key (on Exotel)
On the same page, under API Credentials, copy the API Key. Click Create to generate one if it doesn’t exist yet.
Get your API Token (on Exotel)
Copy the API Token shown alongside the API Key.
The API Token is shown only once when generated. Save it immediately.
Find your Base URL (on Exotel)
The Base URL is the API domain for your Exotel account’s region. India accounts use api.in.exotel.com; Singapore accounts use api.exotel.com. Confirm yours from the domain in your Exotel dashboard URL, or on the API Credentials page (top of your dashboard, or under Developer Settings).
Configure the call flow on Exotel
Create an Exotel App that routes incoming calls to your Sarvam agent, then assign it to your Exophone.
Create a new App
In the Exotel dashboard, open App Bazaar and click Create to add a new App. Give it a recognizable name (e.g. sarvam-prod).
Add the Voicebot applet
In the App flow editor, drag the Voicebot applet into the Call Start flow. (If you don’t see it, search for “Voicebot” in the applet list.)
After connecting
Once both sides are configured:
Add your phone number
In Voice Agents, open your Exotel connection under Deploy → Phone Numbers and add the Exophone number. See Manage Phone Numbers.
Route calls to an agent
For incoming calls, create an Inbound deployment to route the number to an agent. To dial out, add the number to a Campaign.
Verify with a test call
Place a test call to the number and confirm your agent answers. See Manage Phone Numbers for the test-call steps.
Outbound calling uses this same connection - dial out by adding the number to a Campaign. No separate credentials are required.
Enable call transfer
Call transfer on Exotel needs additional applets in your Exotel App. Set up Call transfer on the agent first.
Sarvam URLs
Configure the applets
In the Exotel dashboard, open your App in App Bazaar and build the flow below.
Greeting
In the Call Start flow, add a Greeting applet. Under Audio Choice, choose Type Text, enter a single period (.), and click Save. Under Next, add a Voicebot applet.
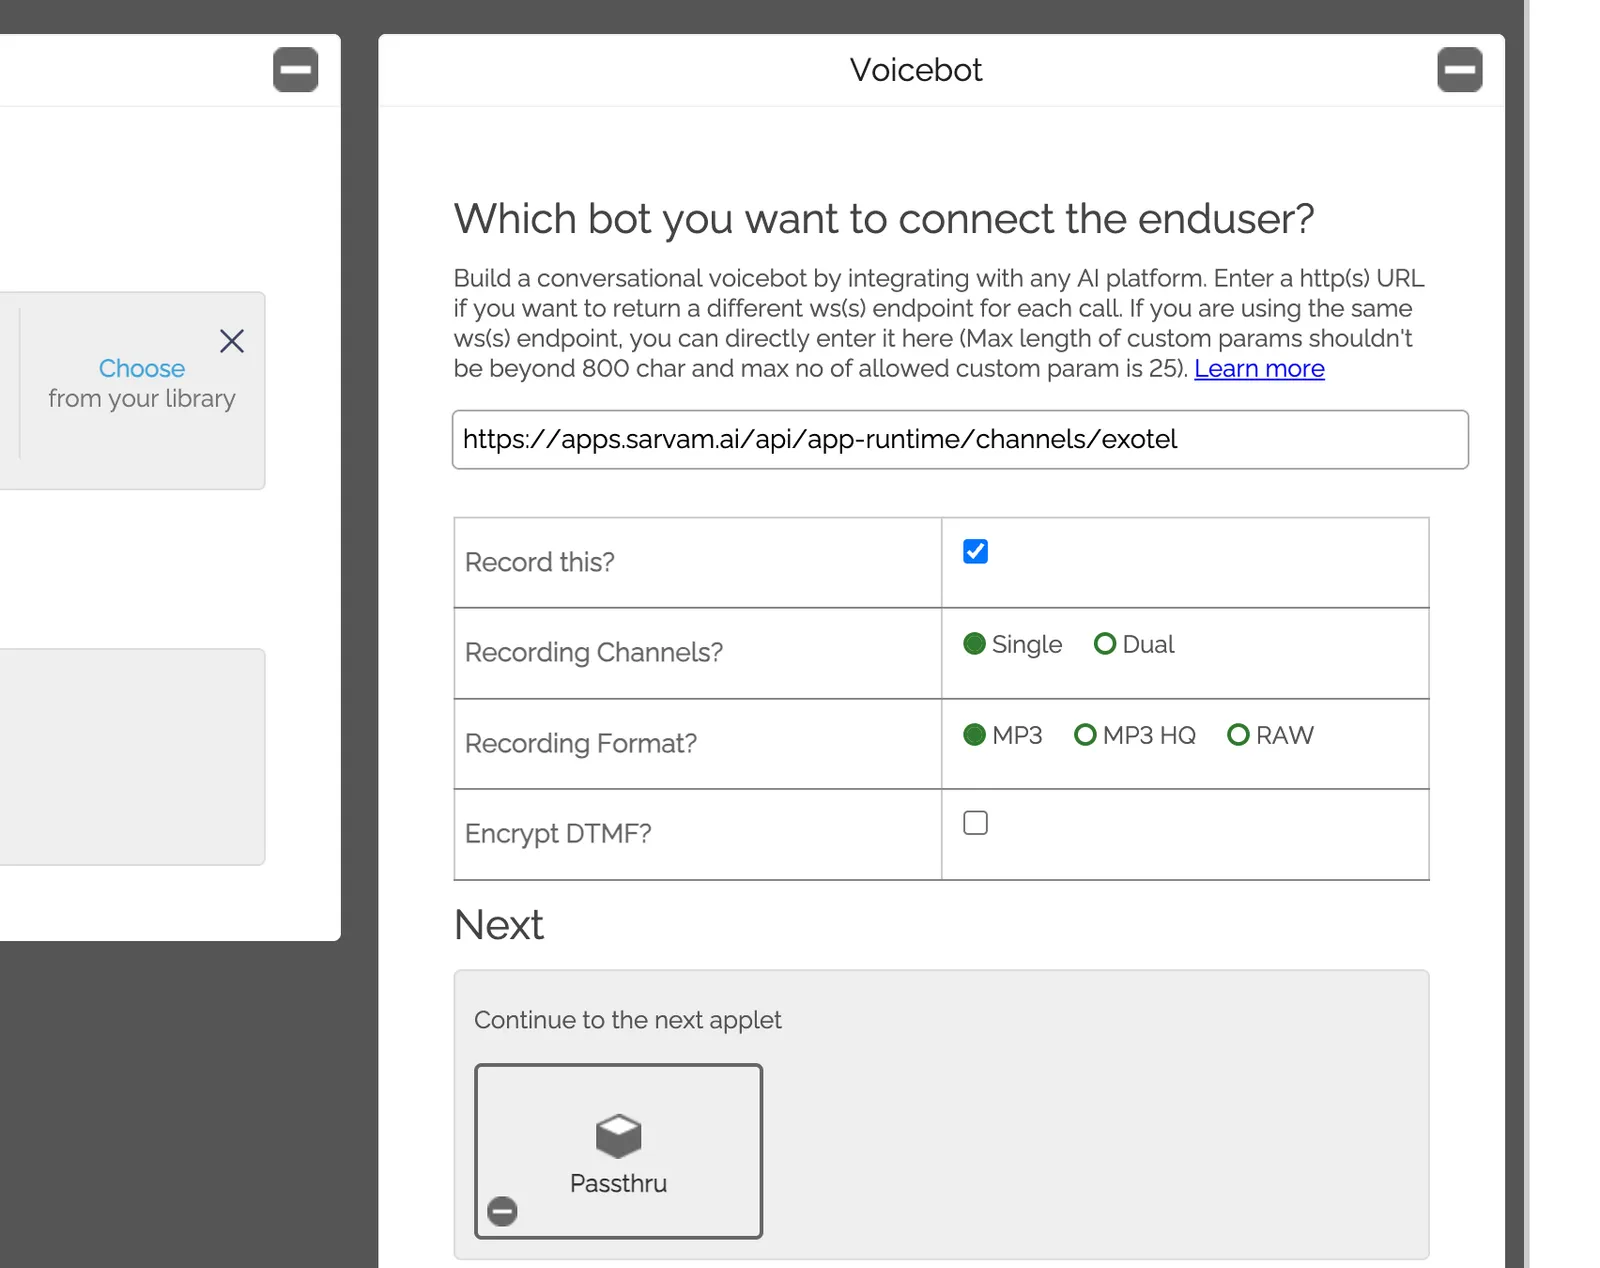
Voicebot
Under Next, add a Passthru applet.
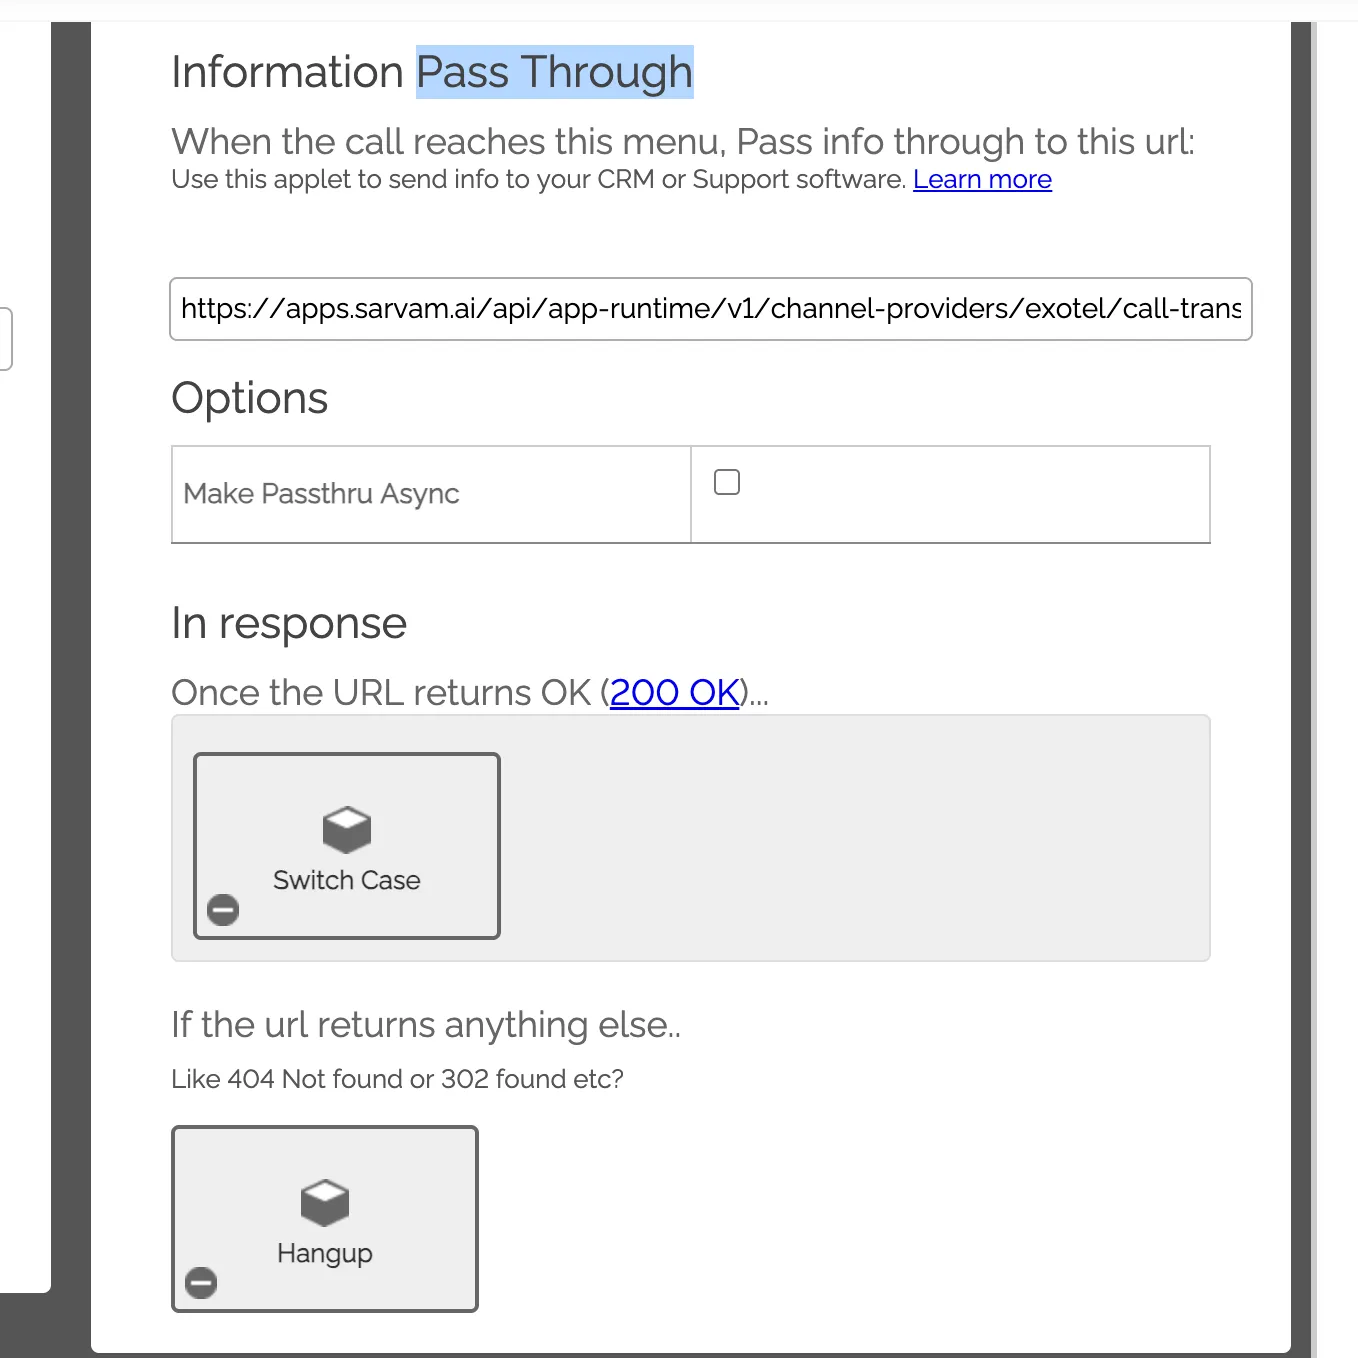
Passthru: transfer status
- Set the URL to the Call Transfer Status URL.
- Leave Make Passthru Async unchecked.
- Under Once the URL returns OK (200 OK), add a Switch Case applet.
- Under If the url returns anything else, add a Hangup applet.
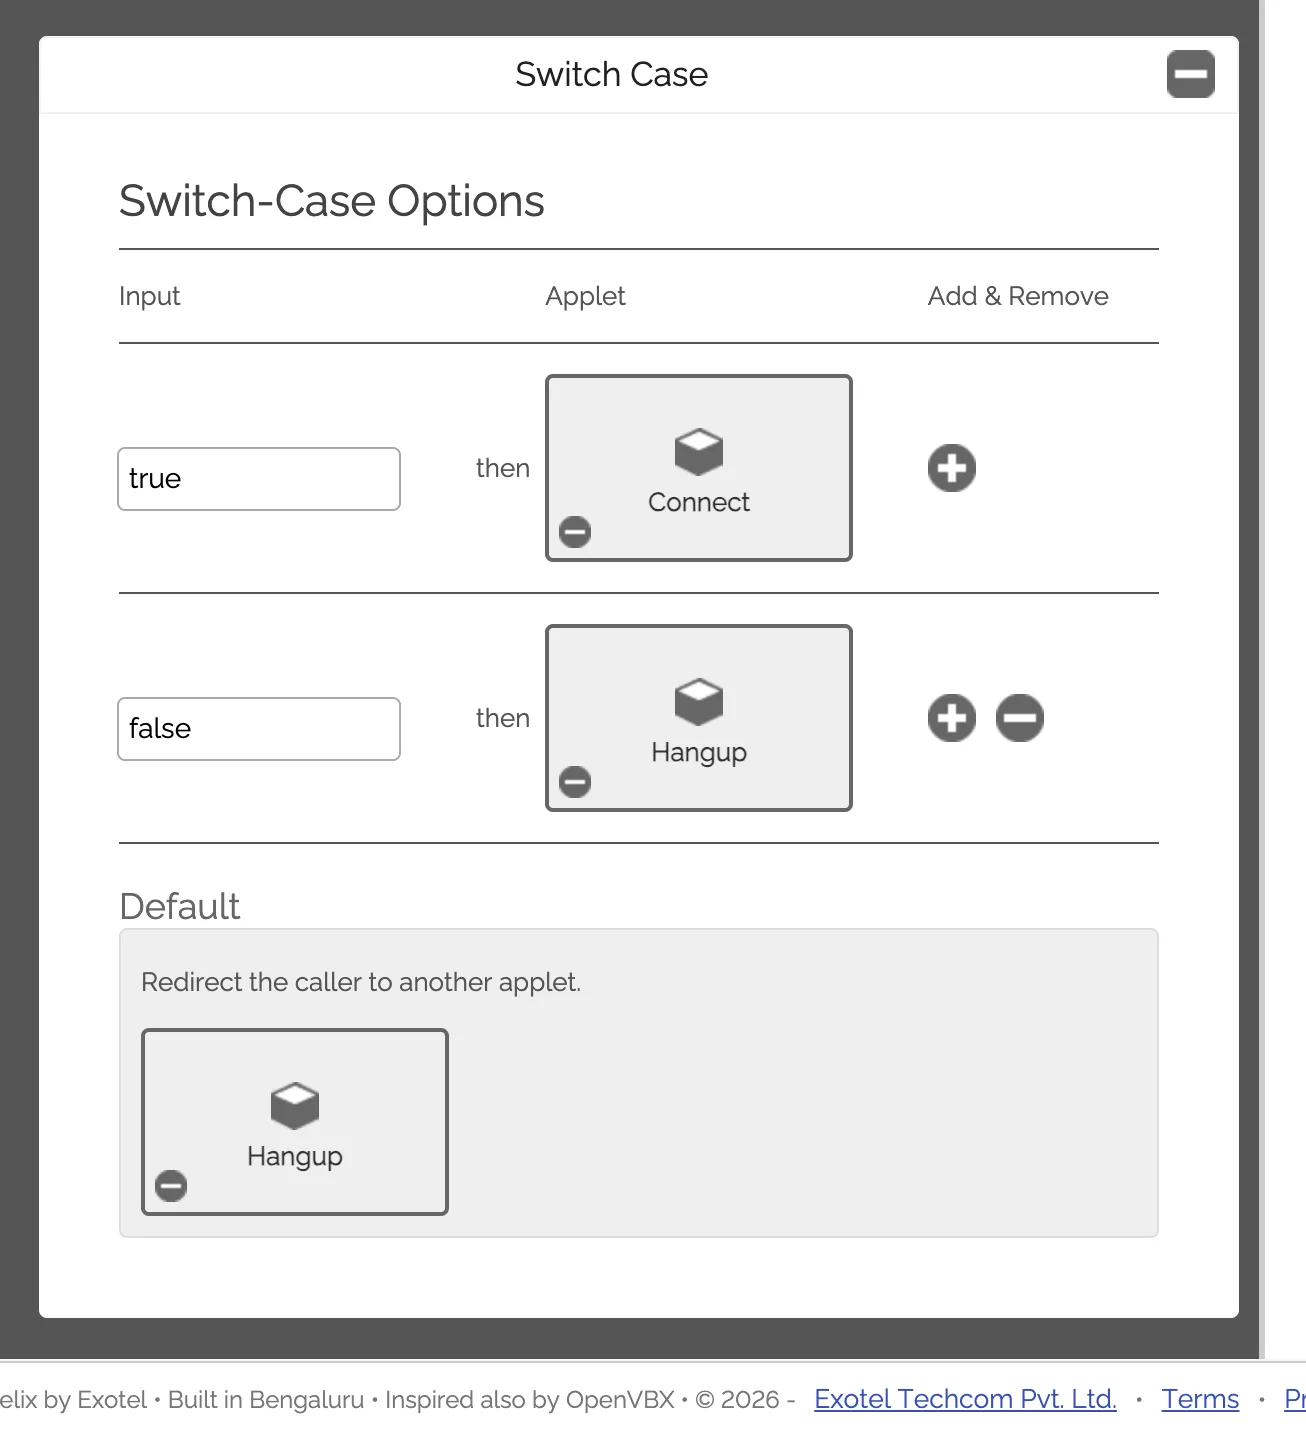
Connect
Under Dial Whom, select Dial phone number(s) returned by URL.
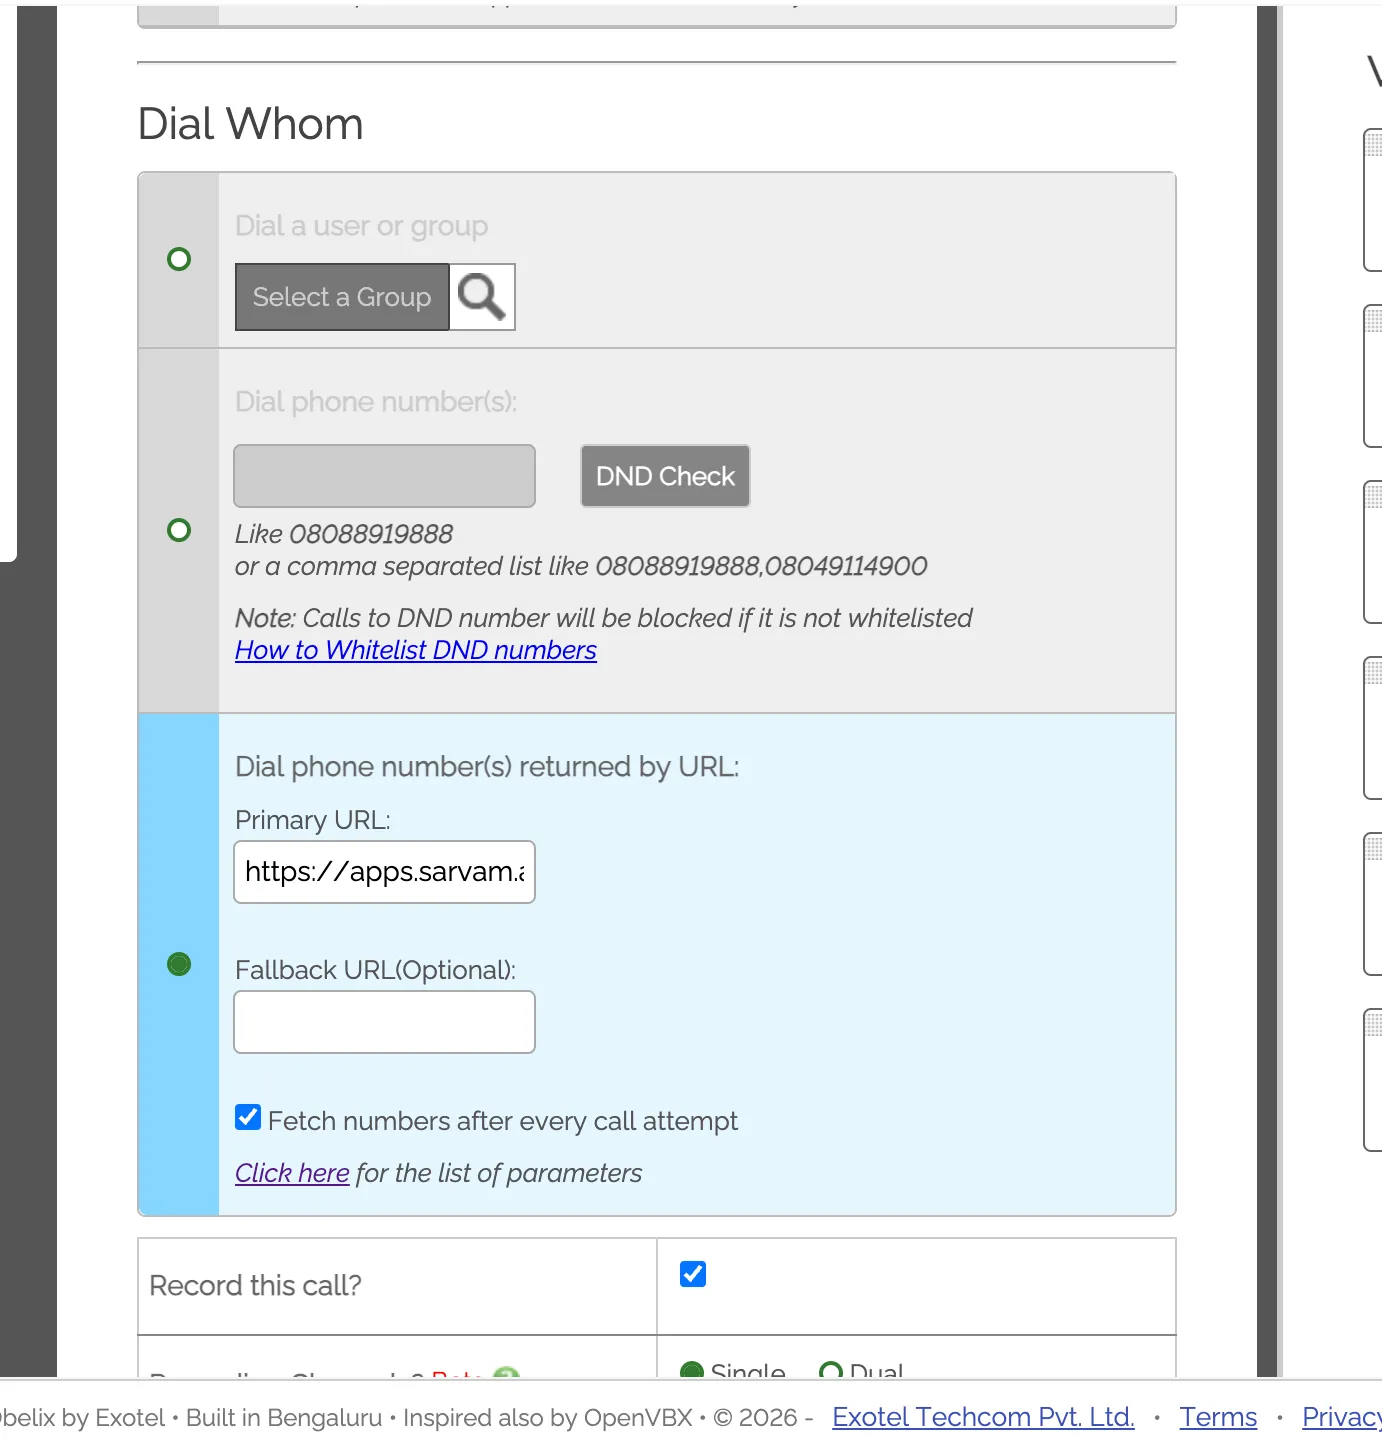
Passthru: transfer details
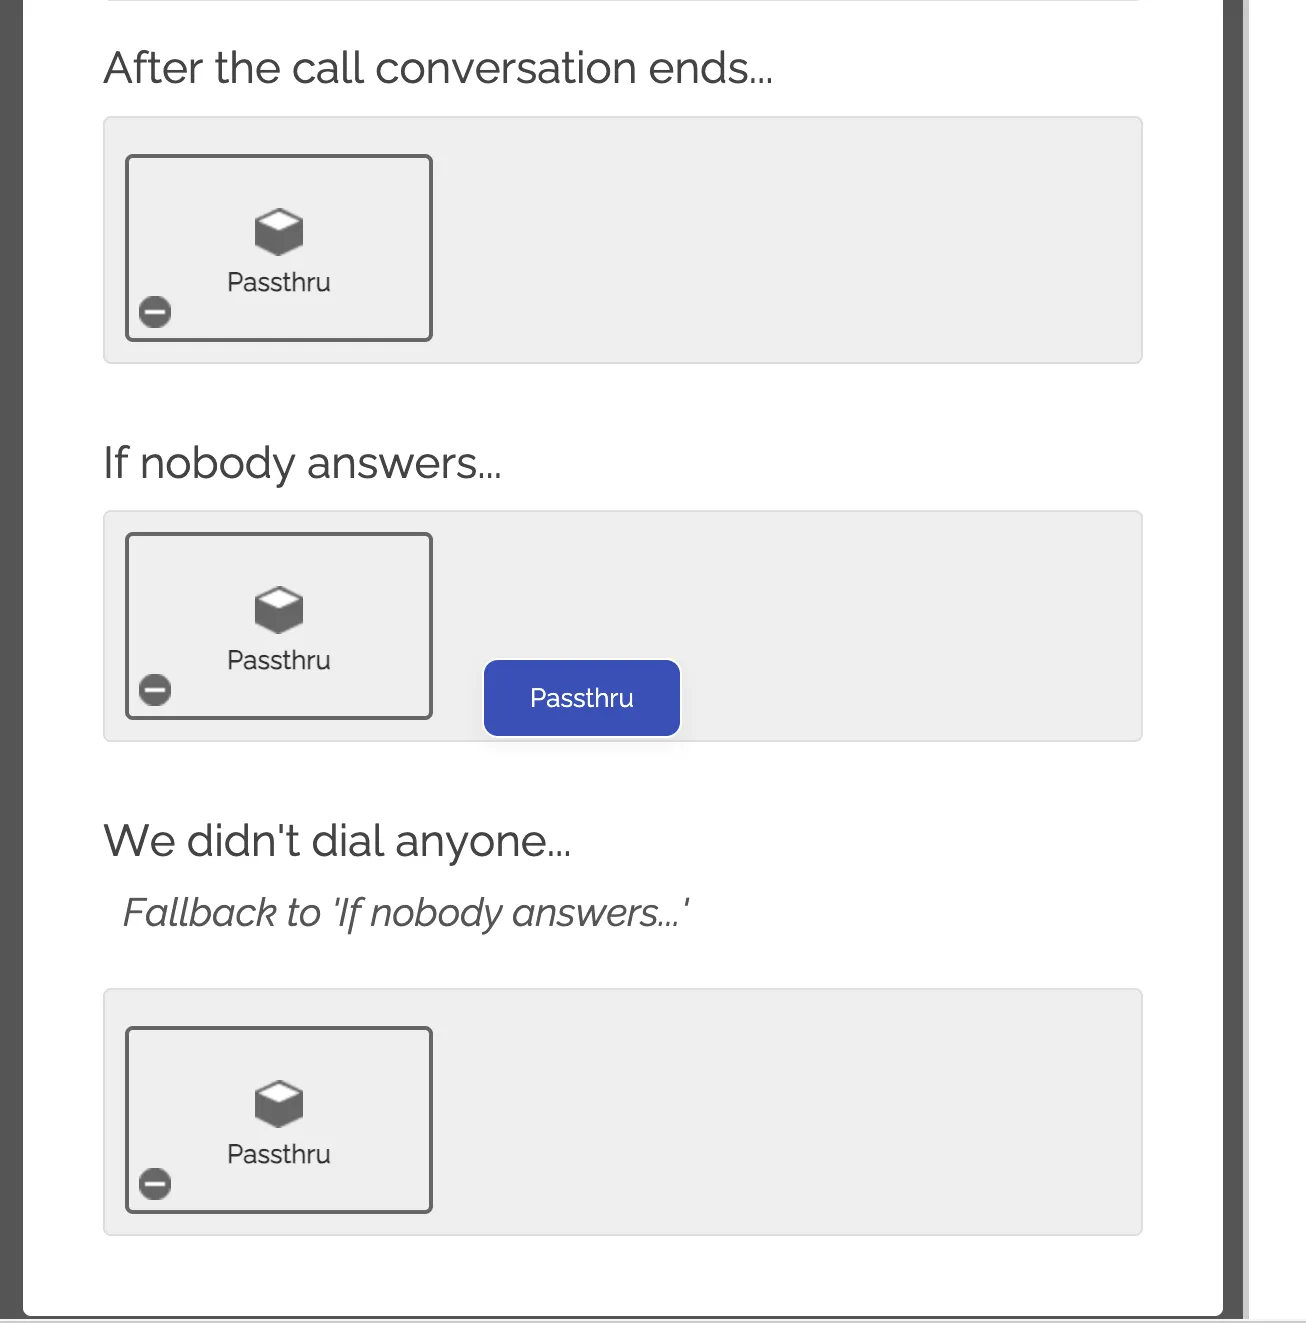
In the Connect applet, add a Passthru applet under each of After the call conversation ends…, If nobody answers…, and We didn’t dial anyone….
In each Passthru, set the URL to the Call Transfer Details URL and add a Hangup applet under both responses.