

Translate a document
Translate renders a whole document into one or more languages while preserving its structure: headings, paragraphs, images, and layout all stay in place. You then review and refine each translation in a rich side-by-side editor with AI assistance, learned rules, and document-level guidelines.
This guide walks through the full flow: open Translate, start a new translation project, add target languages, refine in the editor, and export.
Step 1: Open the Translate page
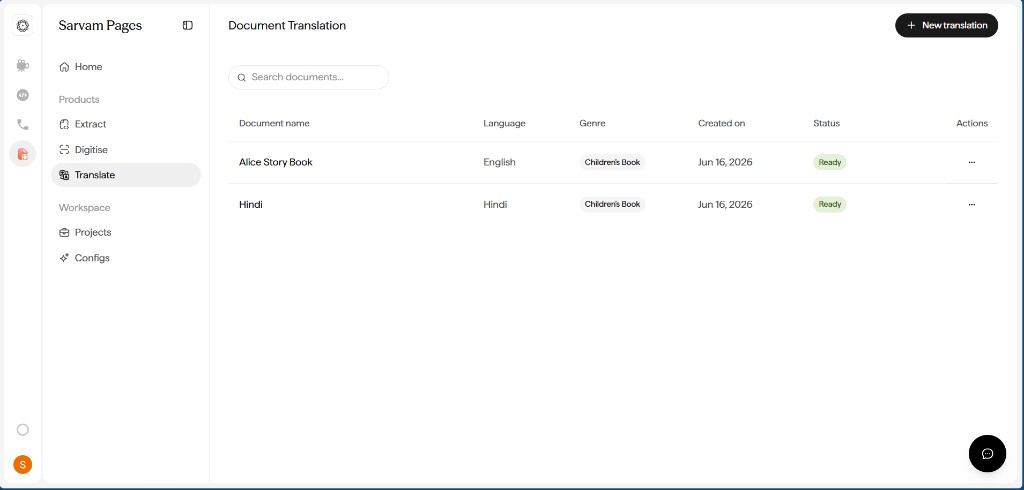
Click Translate under Products in the sidebar. The Document Translation page lists every translation in your workspace with columns for Document name, Language, Genre, Created on, Status, and Actions. Use the search bar to find one quickly.
Step 2: Start a new translation project
Click + New translation to open the New translation project dialog. Upload your document and set up the project.
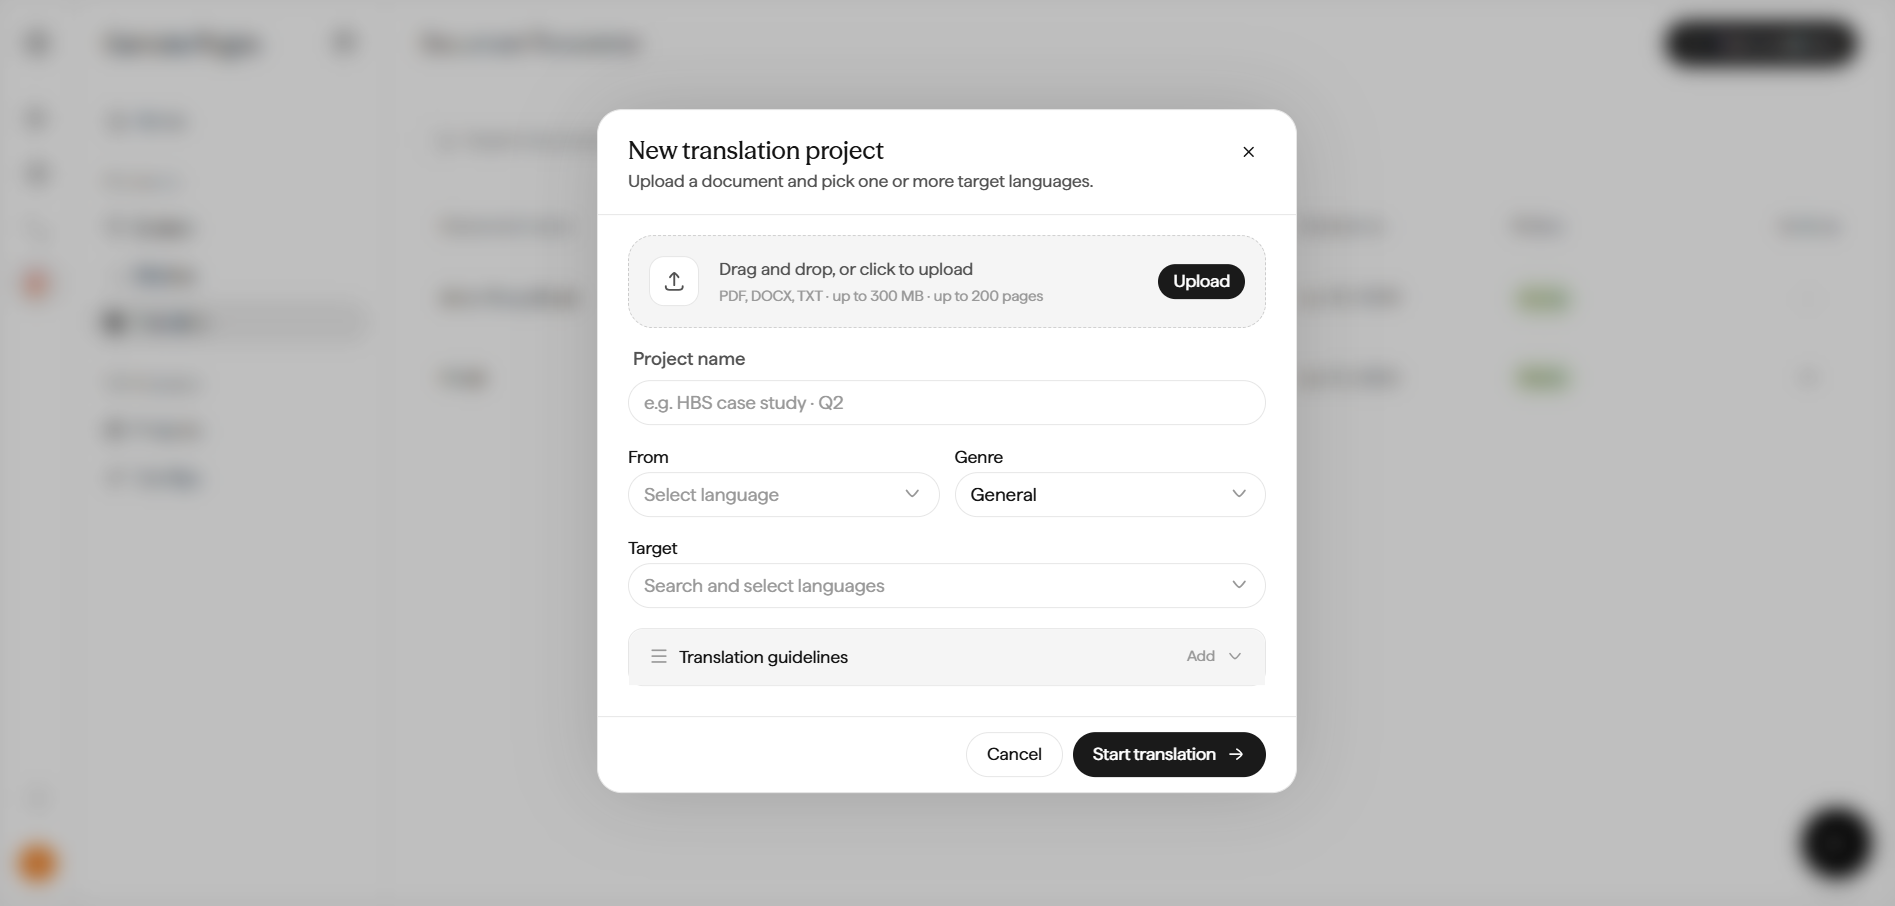
Click Start translation → to kick off the project.
Step 3: Add or manage target languages
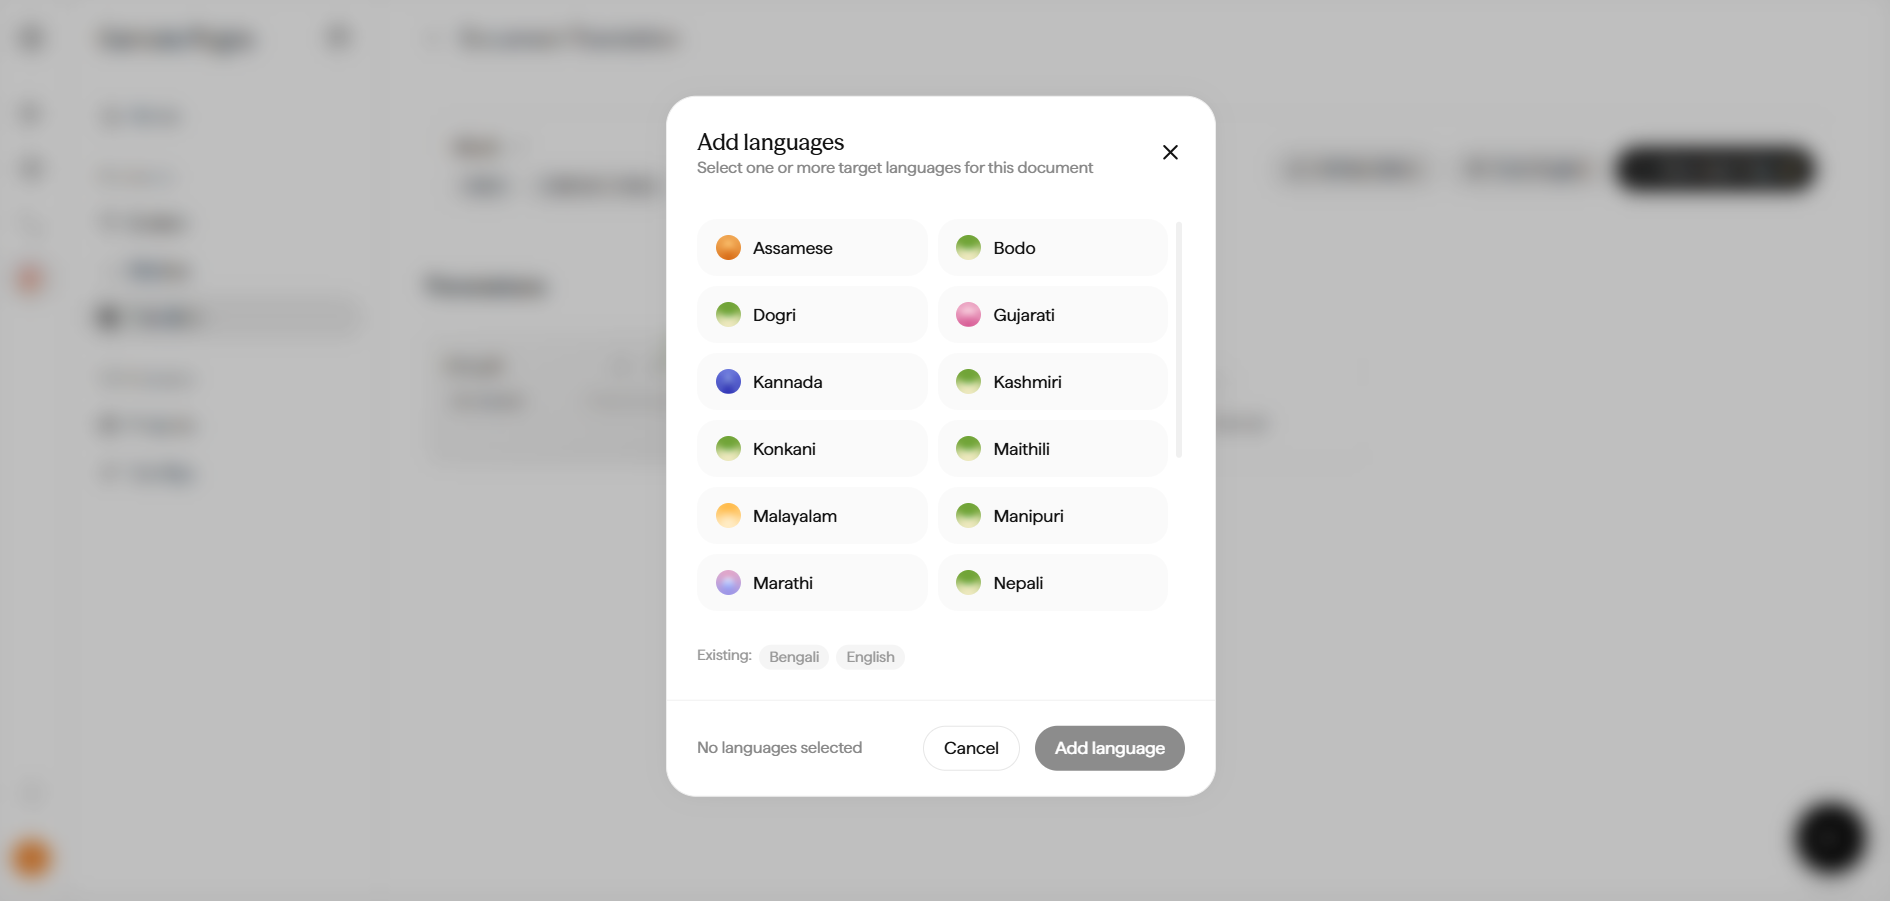
A single document can be translated into many languages. From the document’s detail view, click Add Language to pick from the full set of supported languages: Assamese, Bodo, Dogri, Gujarati, Kannada, Kashmiri, Konkani, Maithili, Malayalam, Manipuri, Marathi, Nepali, and more. Languages already on the document show under Existing.
Step 4: Track progress per language
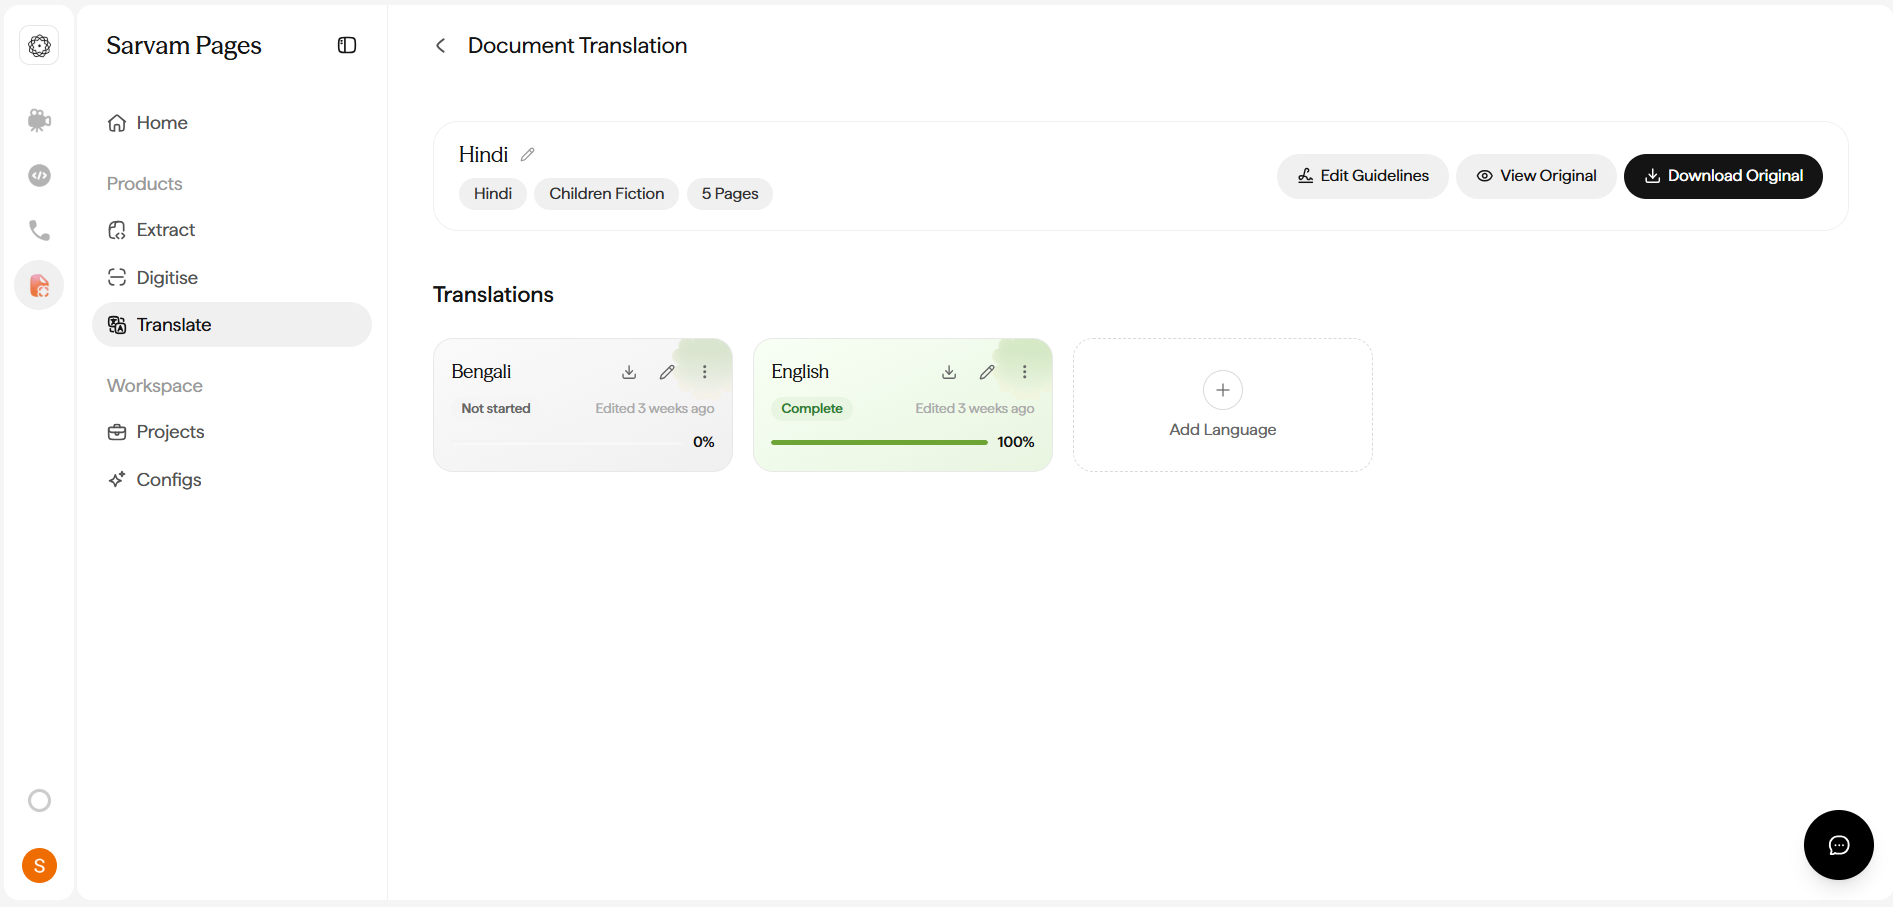
The document detail view shows the source (with its genre and page count), plus a Translations section with one card per target language. Each card shows a status and a progress bar (for example Bengali, Not started, 0% and English, Complete, 100%). Use View Original or Download Original to work with the source, and Edit Guidelines to update rules that apply across every language.
Step 5: Review in the side-by-side editor
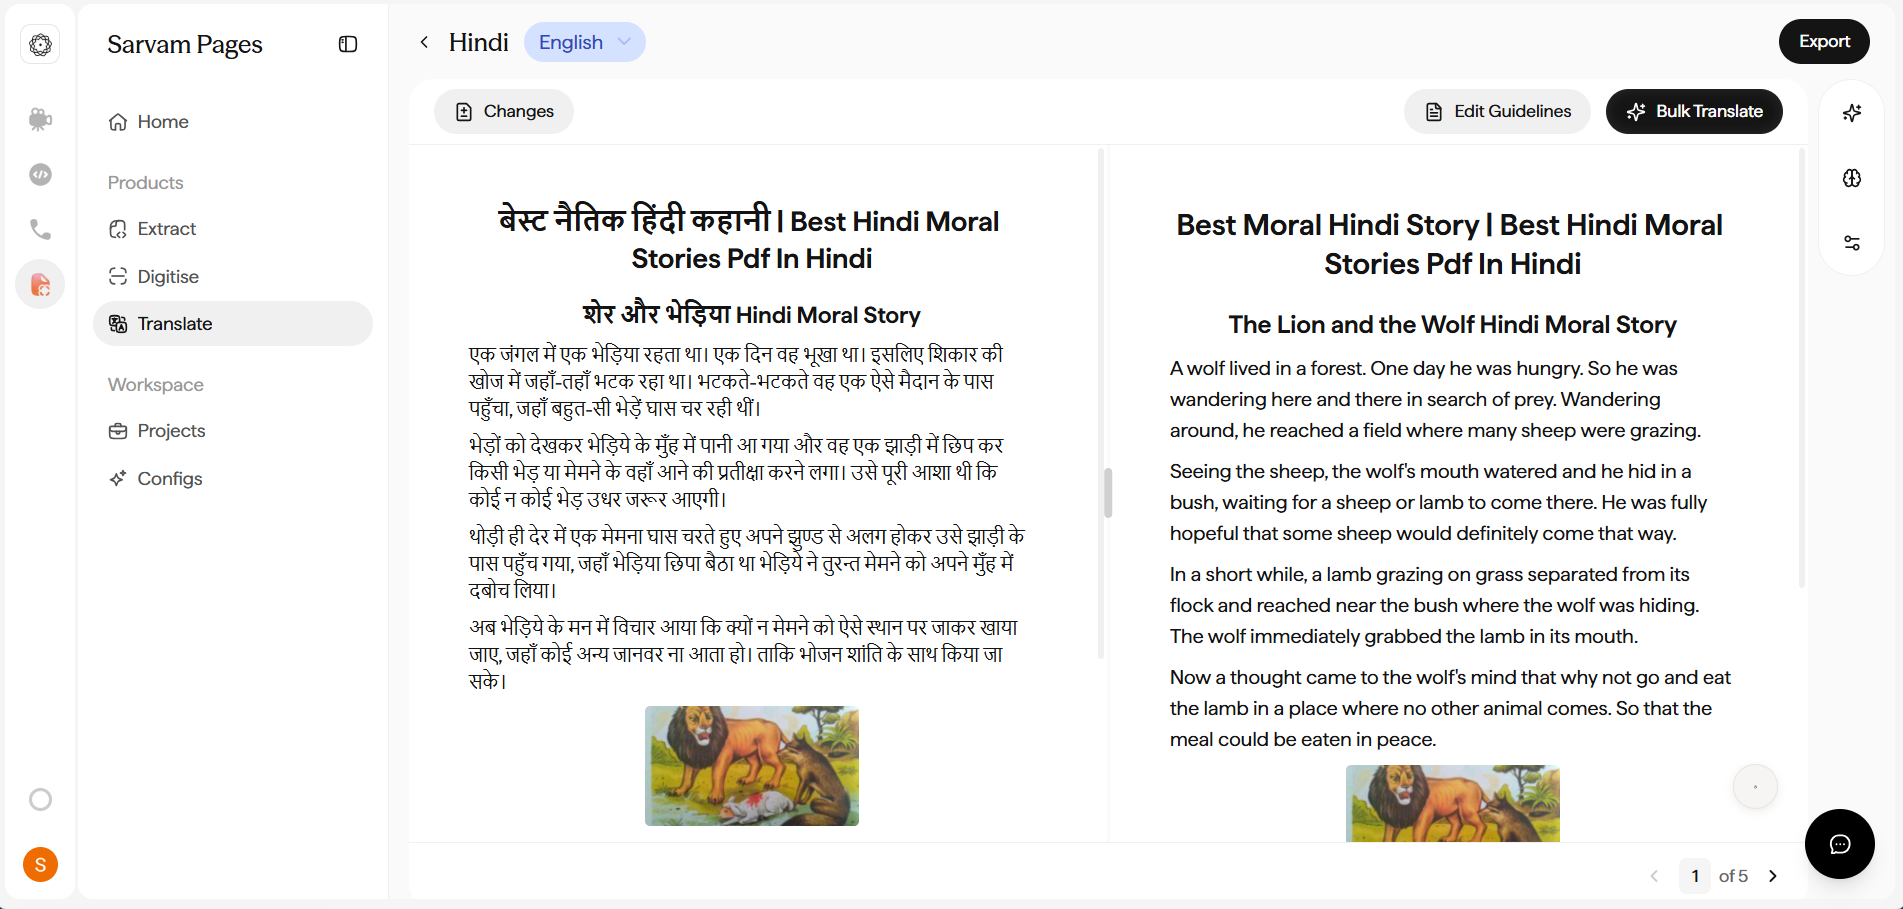
Open a translation to enter the editor. The source sits on the left and the translation on the right, with a language selector at the top so you can switch between target languages. A page selector (< 1 of N >) moves through the document. Three actions live in the toolbar:
- Changes shows your edit history for the document.
- Edit Guidelines opens the document-level translation rules.
- Bulk Translate re-runs the translation across the whole document, applying your latest guidelines and learned rules.
Step 6: Use the side-panel tools
The right rail has three tools:
- AI Assistance. Ask questions about the content (“what is the moral of the story”) and get answers grounded in the document.
- Learned Rules. Corrections you make are remembered and reapplied across the document, so you fix a term or phrasing once.
- Editor Settings. Toggle Transliteration (type English, get Indic suggestions), Spell Check (target-language dictionary), and Editor Stats (word / character / reading-time counts); set Font Size (S / M / L); and choose a Panel Layout (50-50, 40-60, or 30-70 split, or drag the divider).
Step 7: Export
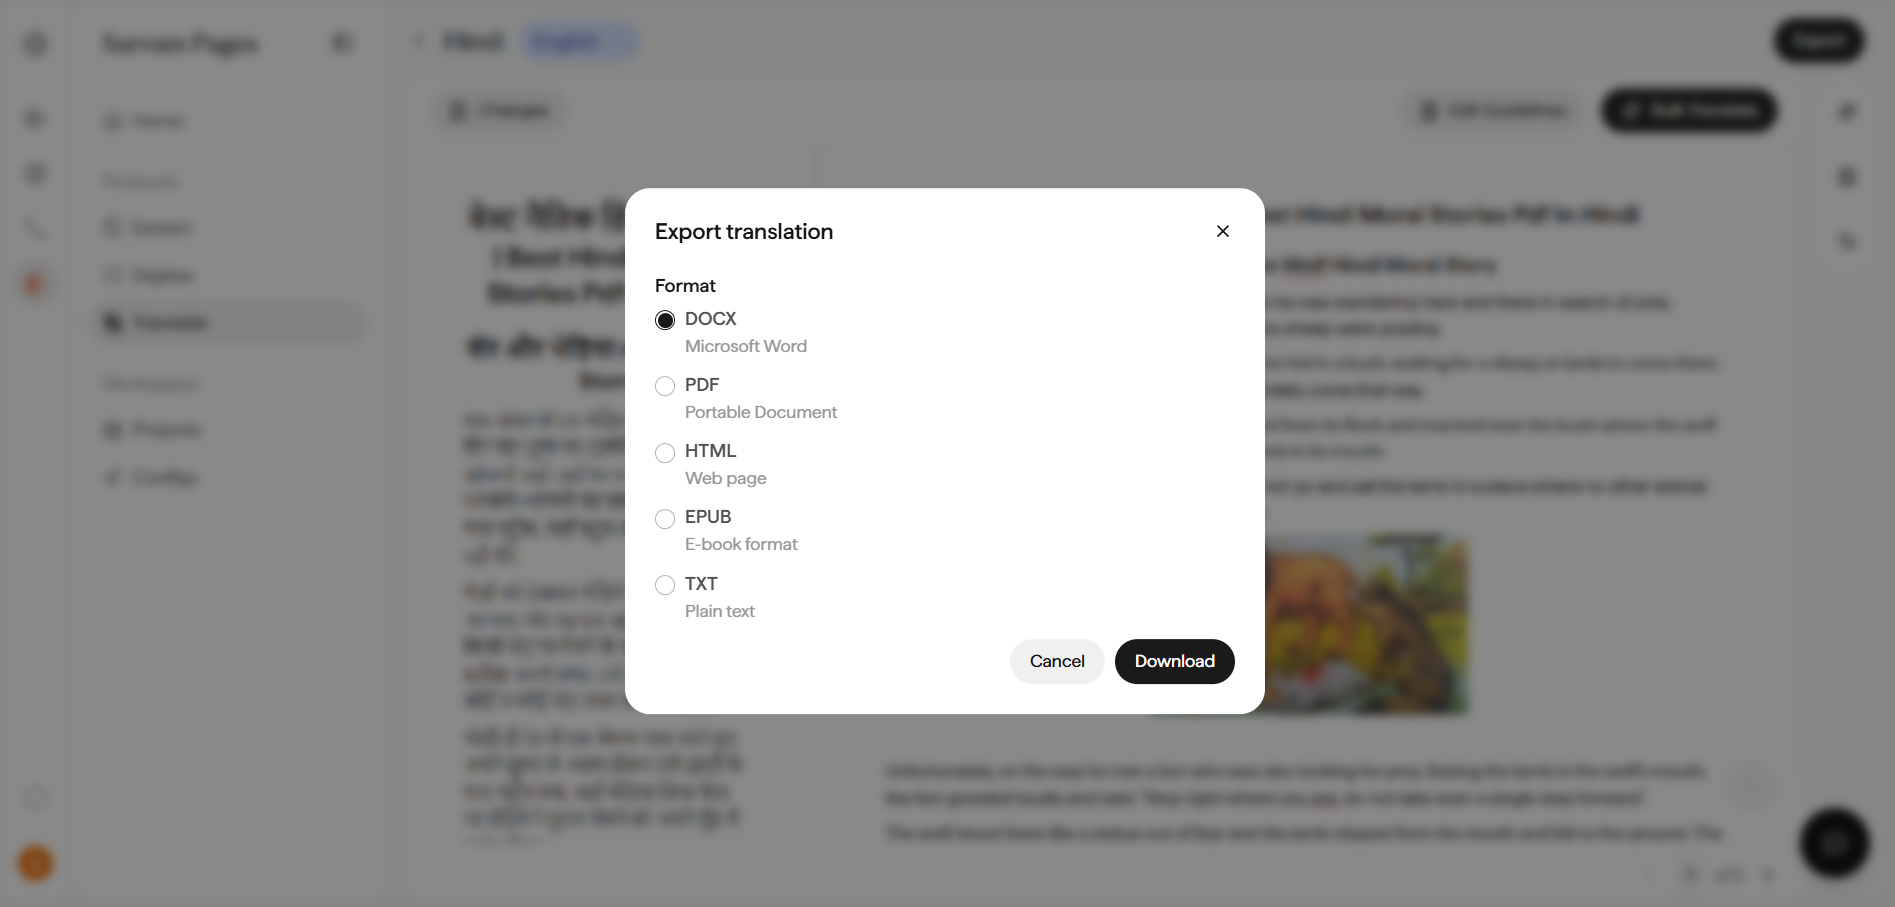
When a translation reads the way you want, click Export in the editor toolbar. Pick a format from the dialog and click Download:
- DOCX (Microsoft Word)
- PDF (Portable Document)
- HTML (Web page)
- EPUB (E-book format)
- TXT (Plain text)
For a multi-language deliverable (say, the same story in Bengali and English), add both target languages to one document. Each gets its own editor and progress bar, all tracked under the same source.
Next: Chain Digitise and Extract.