

Extract as CSV/Excel
Extract as CSV/Excel
Turn table-heavy PDFs (receipts, invoices, bank statements, expense sheets, GST filings) into spreadsheet-ready CSV, Excel (XLSX), or structured JSON.
You’ll need an Extract Config that describes the tabular fields you want. If you don’t have one yet, see How to Create a Config, then come back here.
Step 1: Run the project
Kick off a new project
Click Extract next to your Config, or click Upload documents and pick your file.
Step 2: Review in the editor pane
Once the project shows Completed, click it to jump straight into the editor pane. The source document sits on the left and the extracted tables appear as a hierarchical Output panel on the right. Every row expands to show its fields, and every field carries a per-field confidence score and a source-page reference.
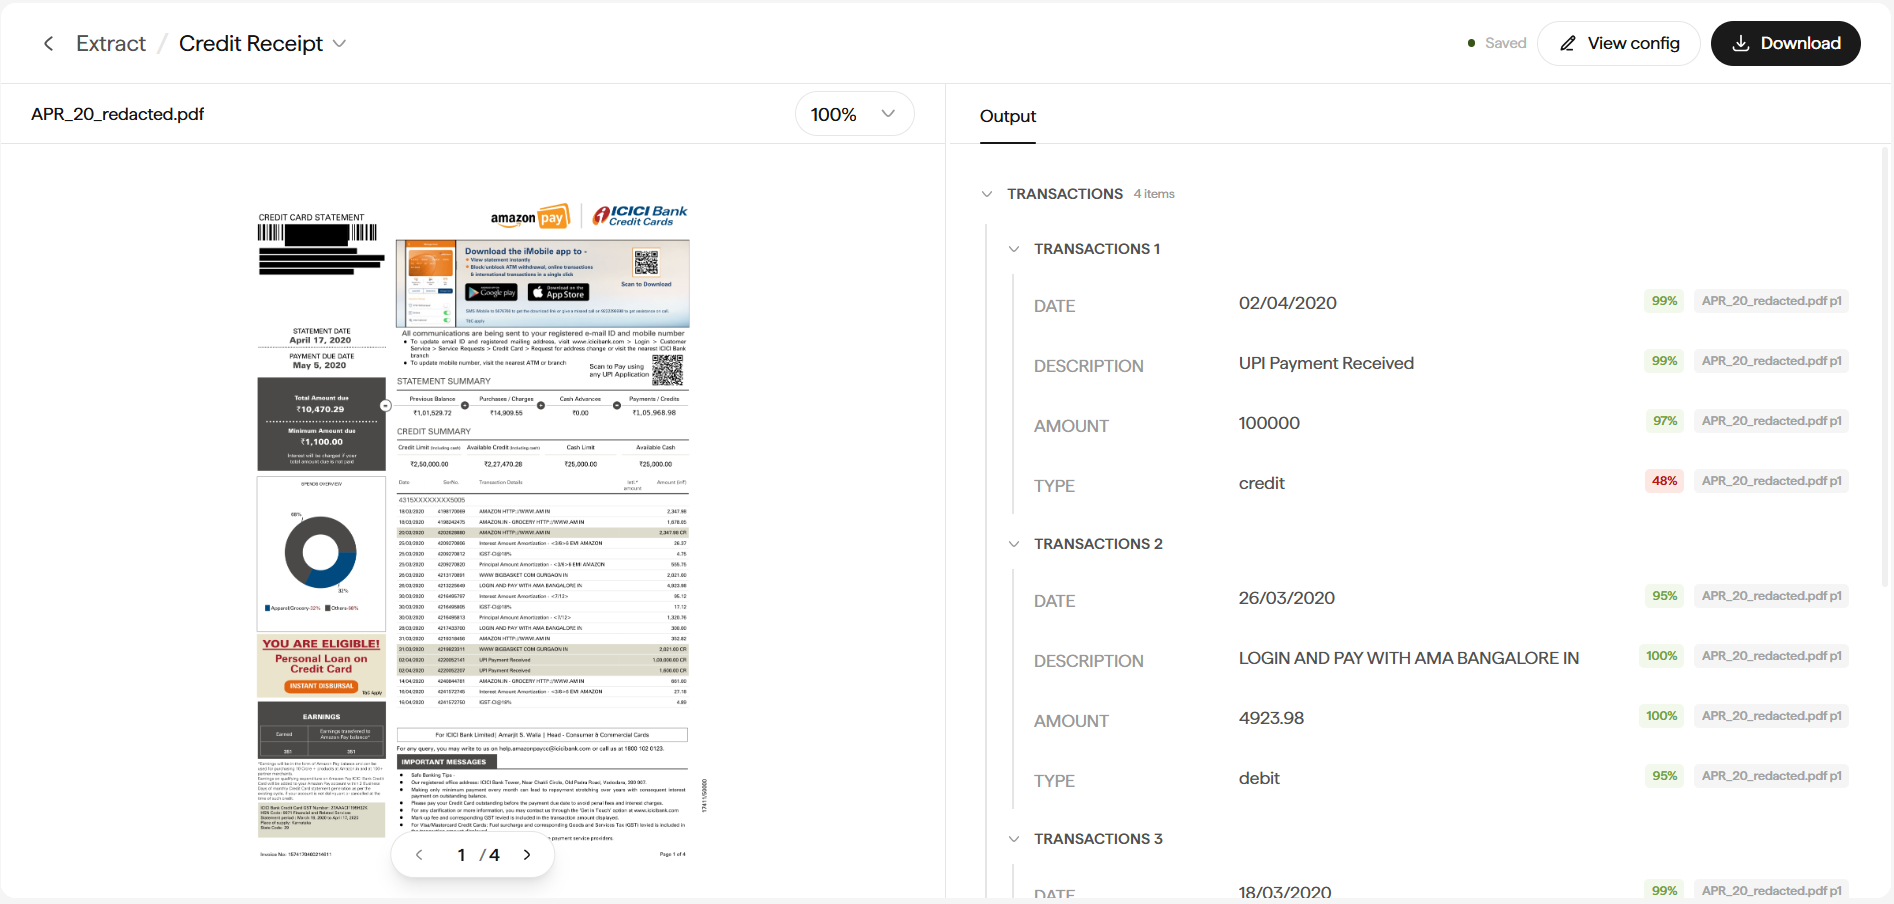
For a bank statement, you might see something like:
Low-confidence values (e.g. 48%) are highlighted so you can spot-review them quickly.
Edit tables in the Table Editor
Double-click any table in the results to open the dedicated Table Editor. It puts the source-table image on the left and an editable grid on the right, so you can fix cells without losing the surrounding page context.
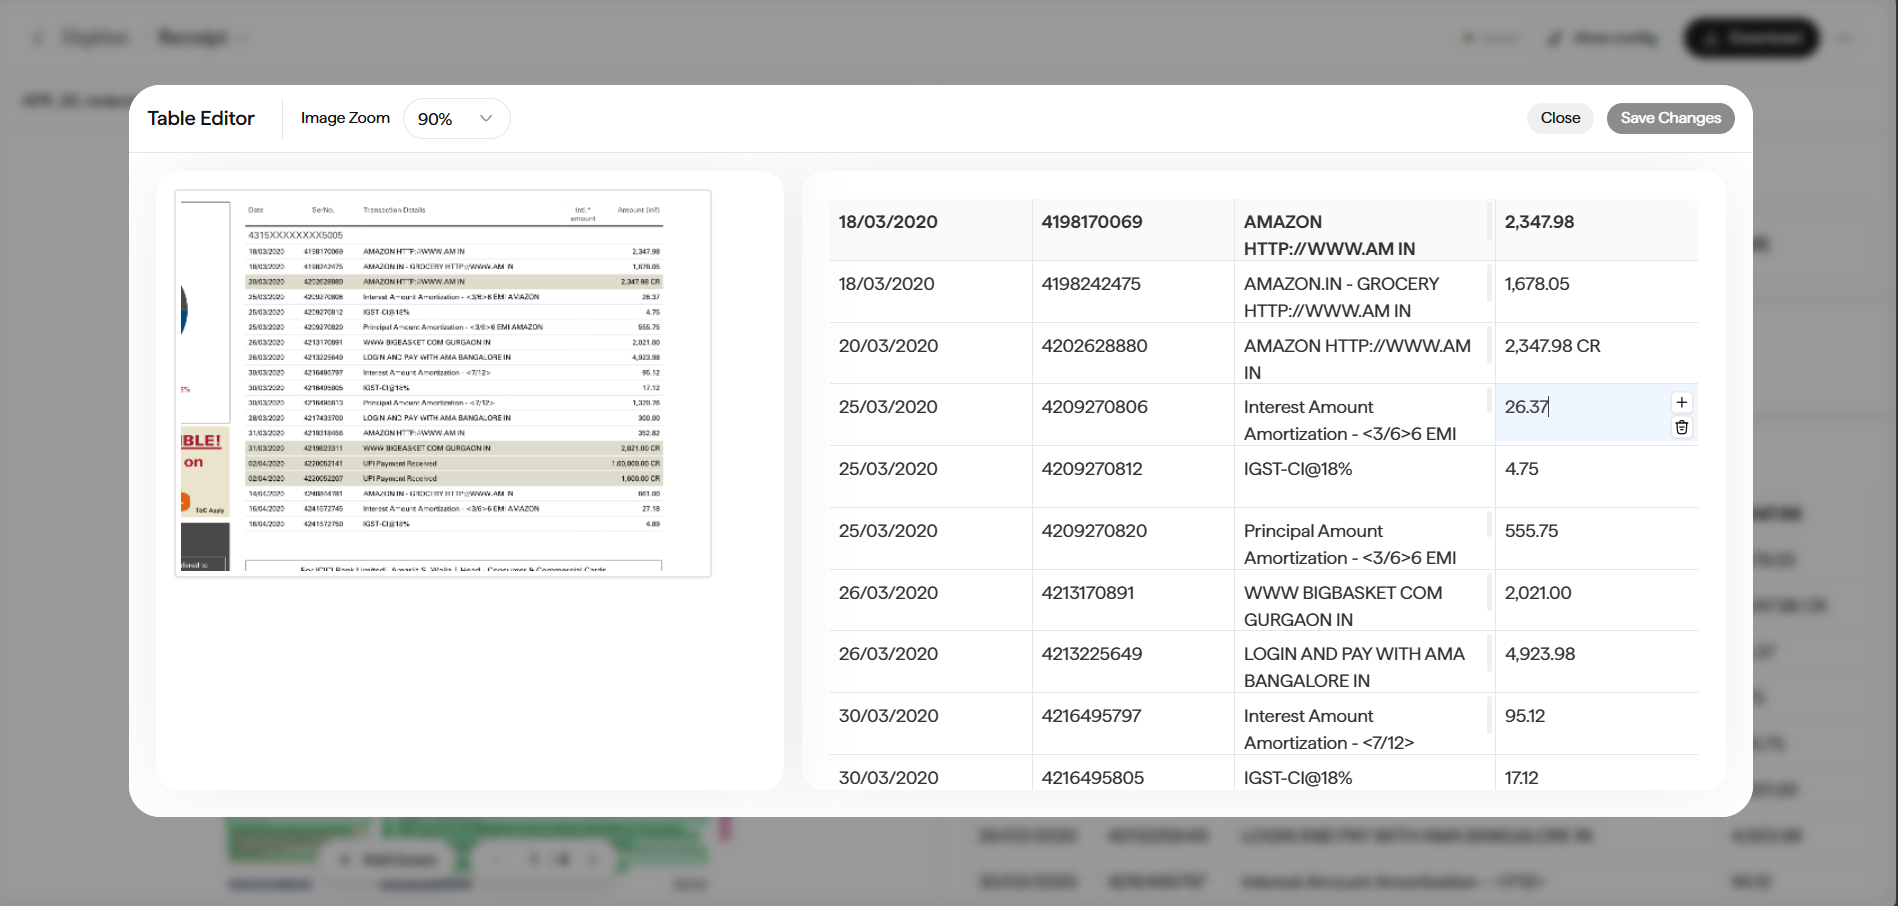
Inside the Table Editor you can zoom the source preview with the Image Zoom dropdown, click any cell to edit its value, add or delete rows with the + and trash icons, then click Save Changes to commit (or Close to discard).
Step 3: Download as CSV, Excel, or JSON
Click Download to open the export dialog and pick your Format from the dropdown.
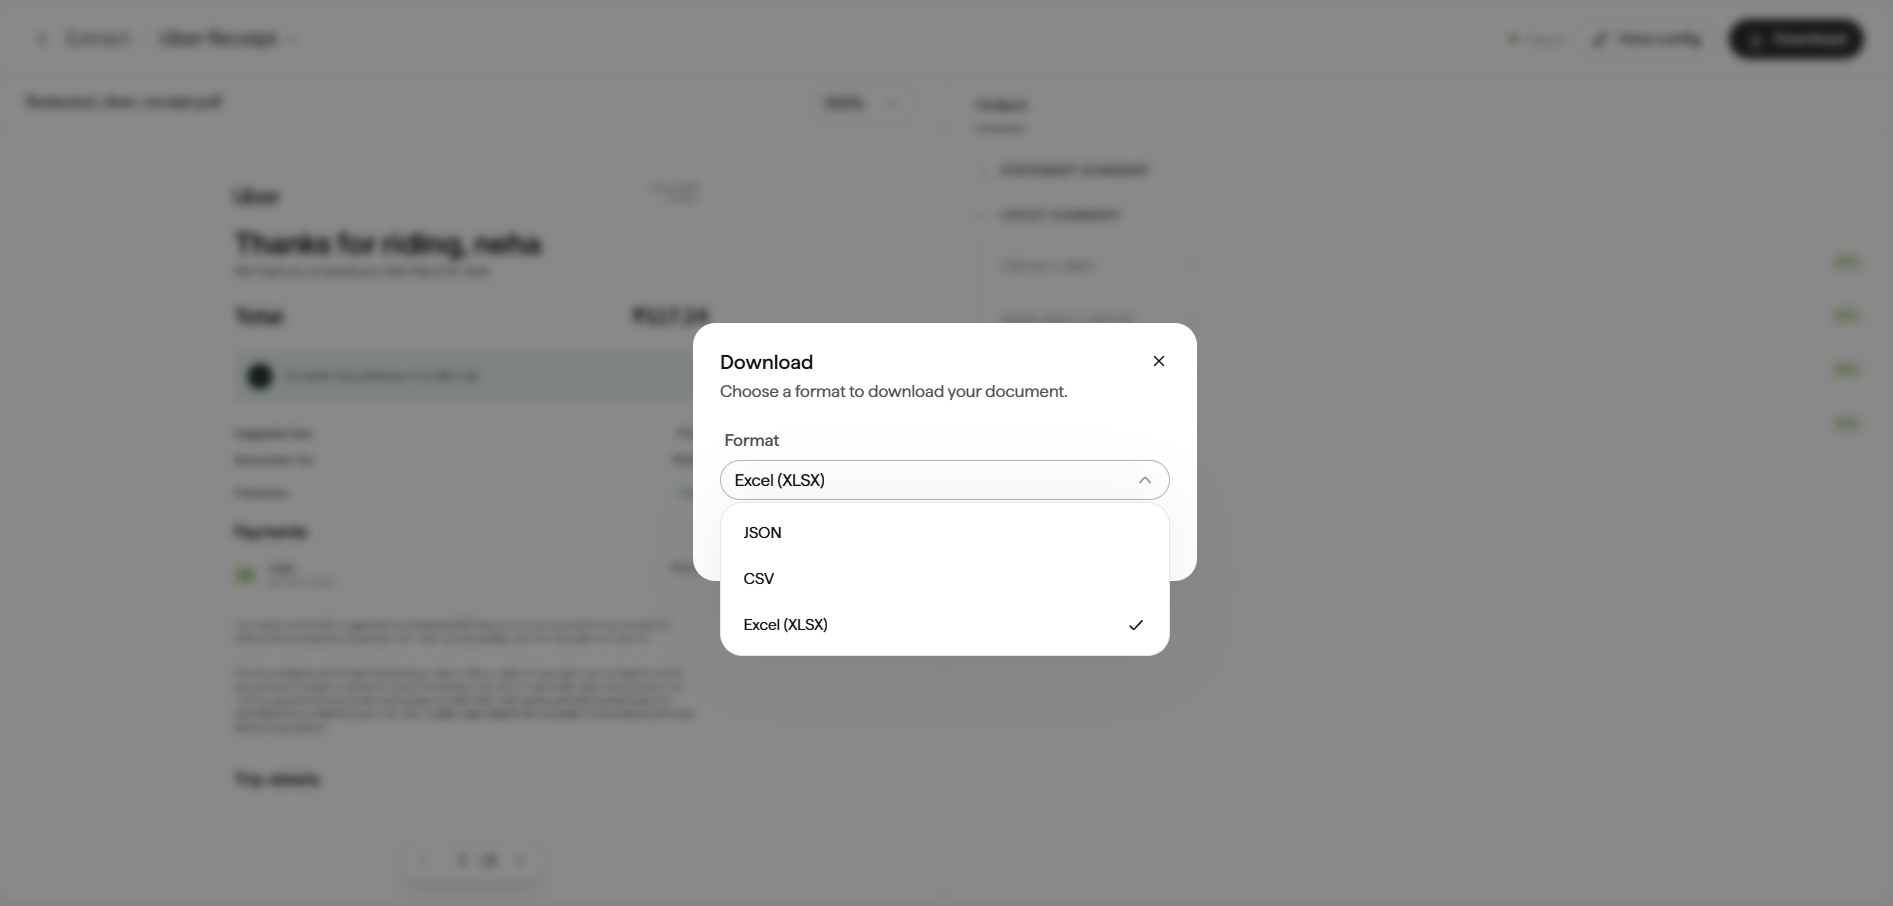
Single-file, one-row-per-transaction. Best for pandas, SQL loading, or a spreadsheet tool.
Native Excel format with headers and cell formatting preserved.
Structured JSON, preserving nested groups and arrays. Best for feeding another system natively.
Confirm to save the file.
Handling tricky tables
Merged or spanning cells
Ask the Extract description to un-merge them:
Sarvam normalises the output for you.
Multi-line descriptions
Bank-statement descriptions often wrap. Sarvam consolidates wrapped lines into a single row by default. To keep them split, add:
Multiple tables on one page
Sarvam detects each distinct table. In Excel output, each becomes its own sheet. In CSV, tables are separated by a blank row. Split on blank rows in your loader.
Numeric formatting (₹ 1,24,500)
Currency symbols and thousands separators are kept as-is unless you ask otherwise. Add:
Batch processing many documents
Two approaches, depending on how many similar documents you have:
Best when you want each document’s rows in its own file. Every project shows up in Workspace → Projects for easy tracking.
Download CSVs or JSON from multiple projects and concatenate them. One paste per project works because column layouts are identical across runs of the same Config.
Next: Chain Digitise and Extract.