

API tool
An API tool is a webhook the agent can call mid-conversation to talk to an external system, look up an order, book a slot, or post a lead to your CRM. At runtime the agent invokes it by name (call tool:your_tool_name in the instructions), the platform makes the HTTP request, and the response comes back for the agent to use in its reply.
Lifecycle: when the tool runs
Set When should this tool run? to one of:
- run (default, shown as During conversation): the LLM-callable webhook, invoked by the agent mid-conversation.
- on_start: fires automatically at call start, typically to pull data into agent variables before the conversation begins.
- on_end: fires automatically at call end, typically to push captured variables out to your endpoint.
on_start and on_end are lifecycle hooks: there is no LLM in the loop, so they are never referenced from the instructions and cannot use a response template. See On-start & on-end hooks.
Two ways to create one
Mock tool
For prototyping, or when you don’t have a real backend yet (or just have example response JSON). Supply a name and a canned response; the platform fills in sensible defaults (a test URL, JSON body, playground mock config) and returns your canned response every time. Great for designing and testing the conversation flow before the real API exists. See Mocking a tool.
Real integration
Provide the actual endpoint URL, HTTP method (GET / POST / PUT / PATCH / DELETE), any static headers, body, query or path parameters, and the auth setup. The fastest way is to paste a cURL command, the builder fills in the method, URL, headers, and body, and everything stays editable. You can also map fields from the response into agent variables so the agent can speak them back.
Authoring an API tool
- Name and describe the tool. Use a snake_case name (for example,
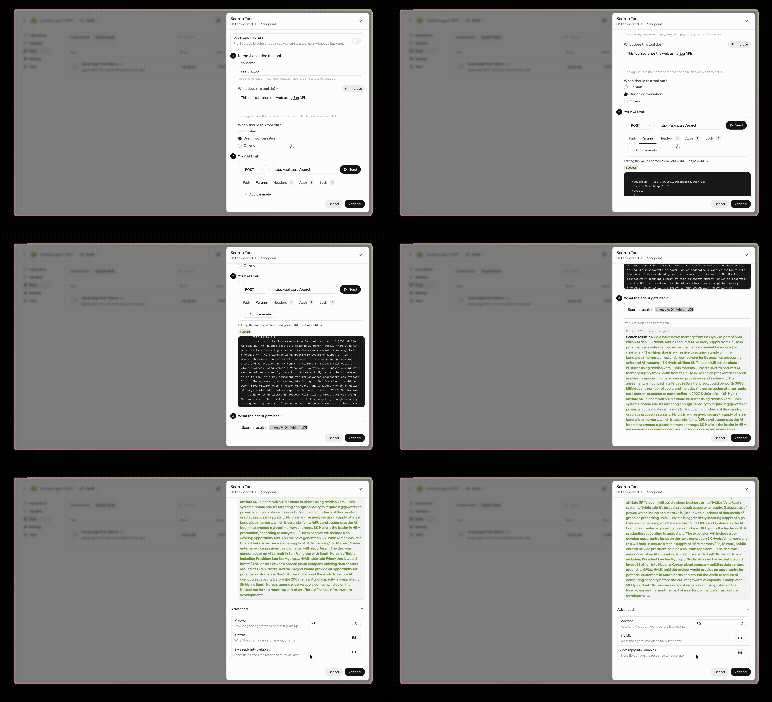
get_order_status) and a clear description, the agent uses both to decide when to call it. - Set your API call. Choose the method and URL, configure Path, Params, Headers, Body, and Auth, then press Test to try it live. Pasting a cURL command still fills these in for you.
- Say what the agent gets back. Write a response template for how the agent should use the result (for example,
The account balance is {{balance}}); type@to insert a field from the reply. - Advanced. Set Max wait (timeout), If it fails (what the agent says on a timeout or error), and Save reply into variables (store response fields into agent variables).
Authentication
Supported auth types: none, bearer token, api_key, and basic.
For any authenticated tool, the credential value is never typed into the tool config. You enter it through a secure masked input, the secret is stored safely in your workspace (see Secrets), and the tool references it, so tokens and keys never sit in plain text in the agent definition.
Call-context variables
An API tool can receive live call context alongside the agent variables you define. Four are available:
How to use them
- Open the tool editor for your API tool (or create one — see Authoring an API tool).
- In the Body, Params, or Headers section, type
@to open the variable picker. The call-context variables appear alongside your agent variables. - Select User Identifier, Call Transcript, Interaction ID, or Call Length — the platform substitutes the live value at request time, the same way it substitutes agent variables.
- Press Test to verify your endpoint receives the values you expect.
User Identifier is populated on inbound calls. On outbound calls, use the number from the campaign contact instead.
Because these are resolved at request time, a mid-call tool always sees the current state: the transcript includes everything said up to that point, and Call Length reflects the elapsed duration when the tool fires.
Network access
If your endpoint sits behind a firewall or VPC (for example, an internal CRM), allowlist Sarvam’s IPs so the platform can reach it:
4.213.167.7035.154.84.150
Add these IPs to your firewall or security group rules before testing the tool.
Typical build order
- Create the tool (mock or real).
- Enable it on the agent.
- Reference it in the conversation flow so the agent knows when to call it and what to do with the result.
- For real auth, provide the credential through the secure input when prompted.
Practical notes
- Keep timeouts tight (configurable up to 30s) so the caller isn’t left waiting in silence.
- Map the response into variables so the agent can use what it fetched (“I see your order shipped Tuesday”).
- Design around latency: a mid-call API hit means a pause on the line, so have the agent say something like “let me pull that up” first.