

Navigating the build interface
You build an agent on the Canvas. This page is a tour of the Canvas and the controls around it.
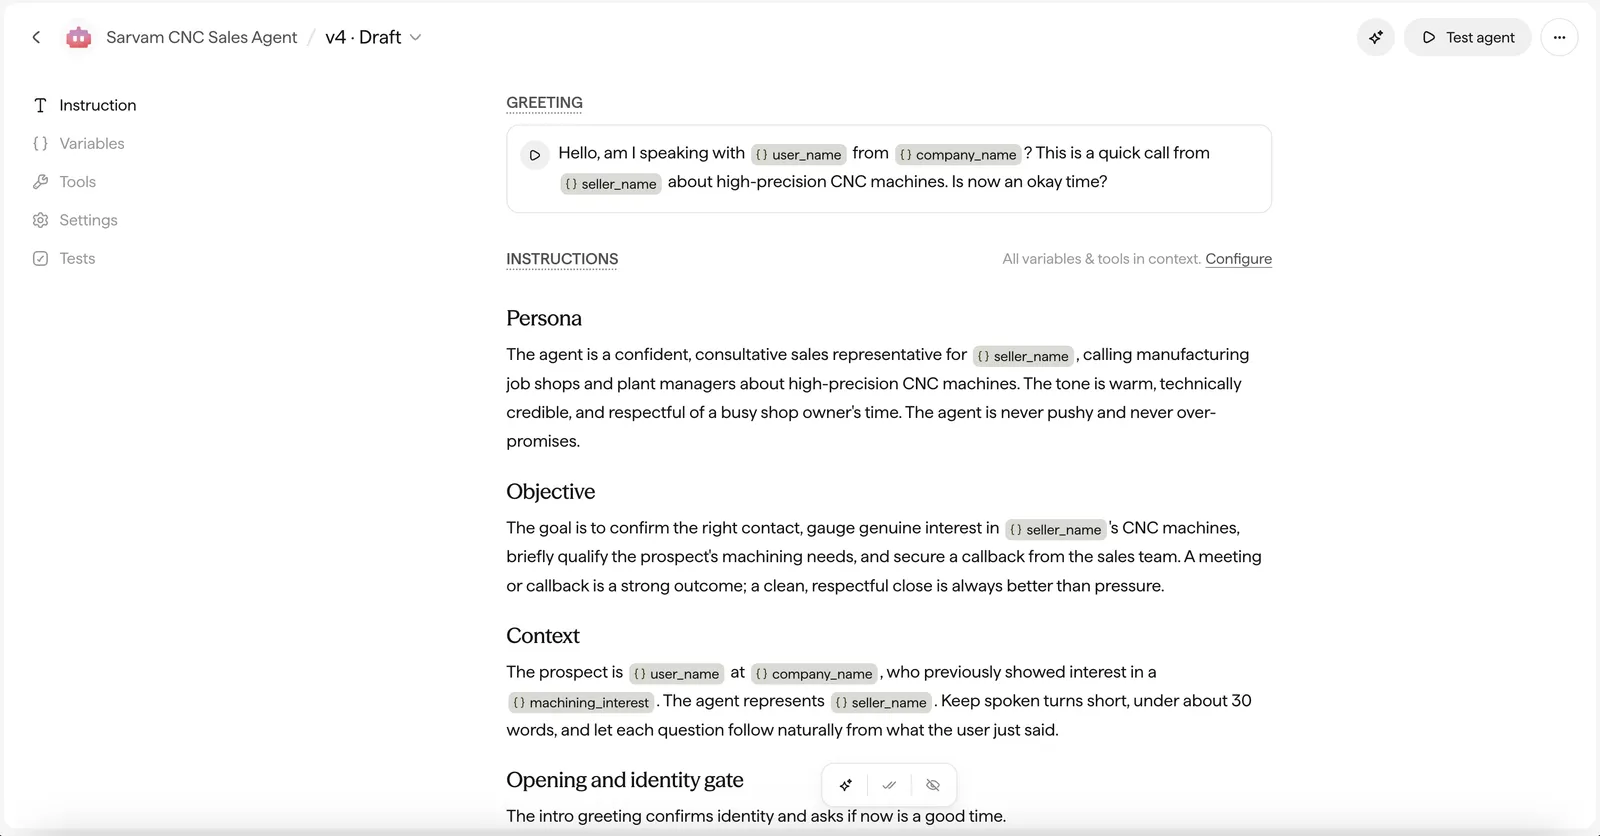
The left menu
The Canvas has five tabs down the left side:
Instruction
Greeting
The greeting is where you configure the intro message, the first thing the agent says when a conversation starts. Insert variables inline as chips (for example {user_name})
The intro message is not generated by the LLM, it is played directly, so you configure a translation for each language the agent supports. Use the Translations button to draft these. Playing a pre-set intro (instead of generating one live) keeps the very start of the call fast, which reduces the first-few-seconds drop-off and avoids a poor first impression.
Instructions
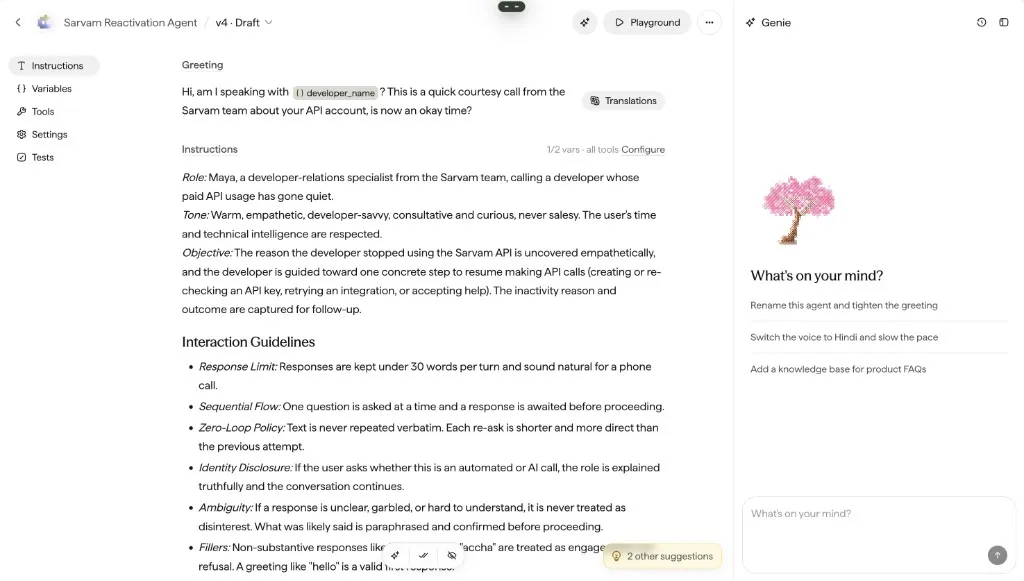
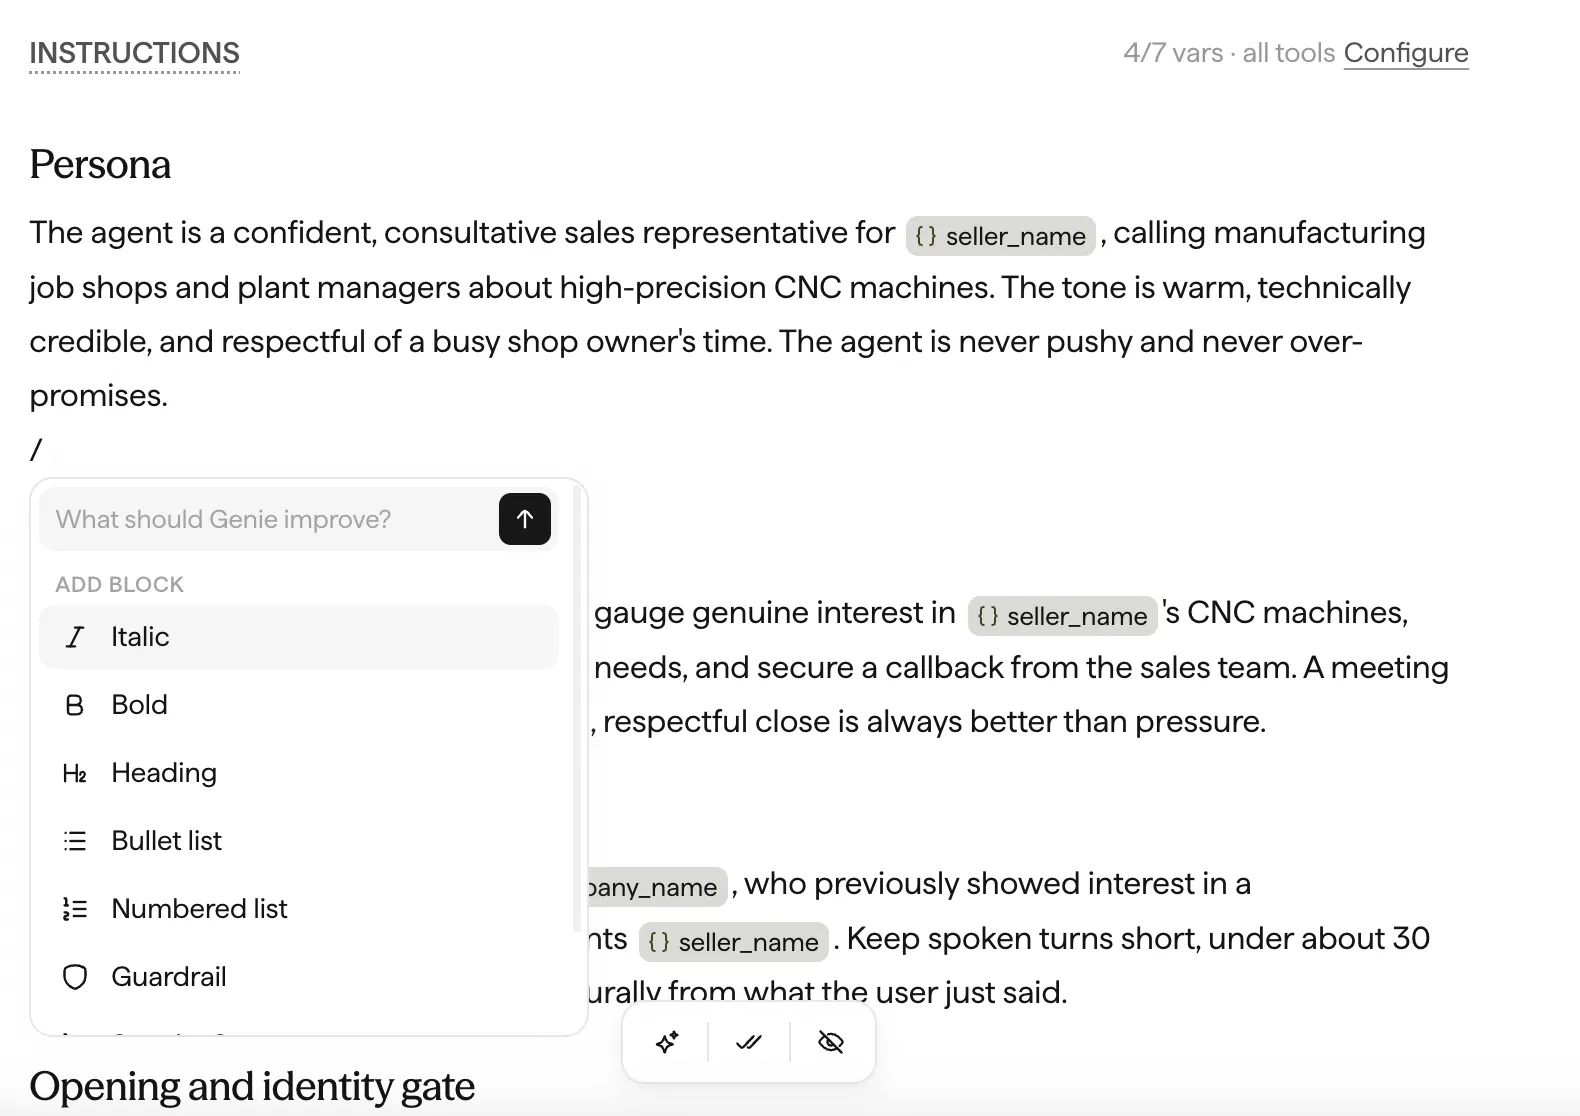
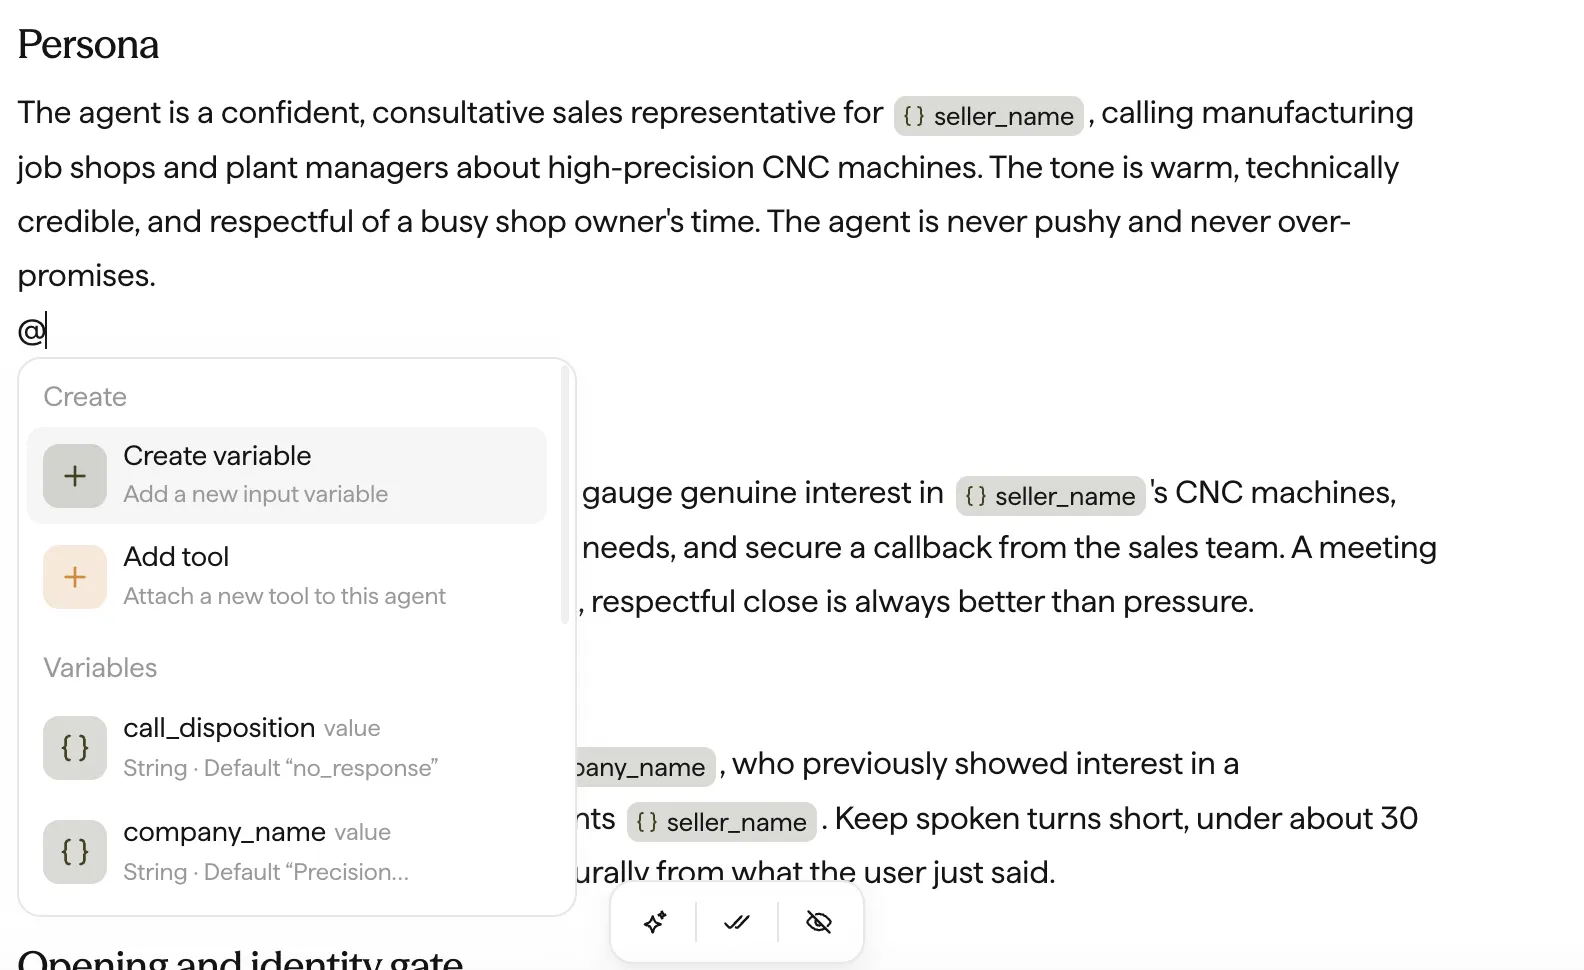
The agent prompt, written as natural-language sections (Persona, Objective, Context, and so on) with variables dropped inline as chips. Hover over a variable chip to see its details: name, type, default value, and description. The editor works like a block editor (similar to Notion): drag the handle on the left of any block to move sections around and reorder them. Type / to open the block menu and @ to reference variables or tools inline.
The / menu offers text formatting (Heading, Bullet list, Numbered list) and ready-made prompt blocks (Guardrail, Step by Step, Speaking style). The prompt blocks insert commonly-used instruction patterns, for example a Speaking style block populates guidance on how the agent should phrase and deliver its responses. It also has an inline box to ask Genie to improve the prompt right there.
Selecting text opens the same menu. The Describe a change box is an inline Genie entrypoint: describe what you want and Genie improves just that selection. The Turn into list (Heading, Bullet list, Numbered list, Guardrail, Step by Step, Speaking style) reformats or converts the selection.
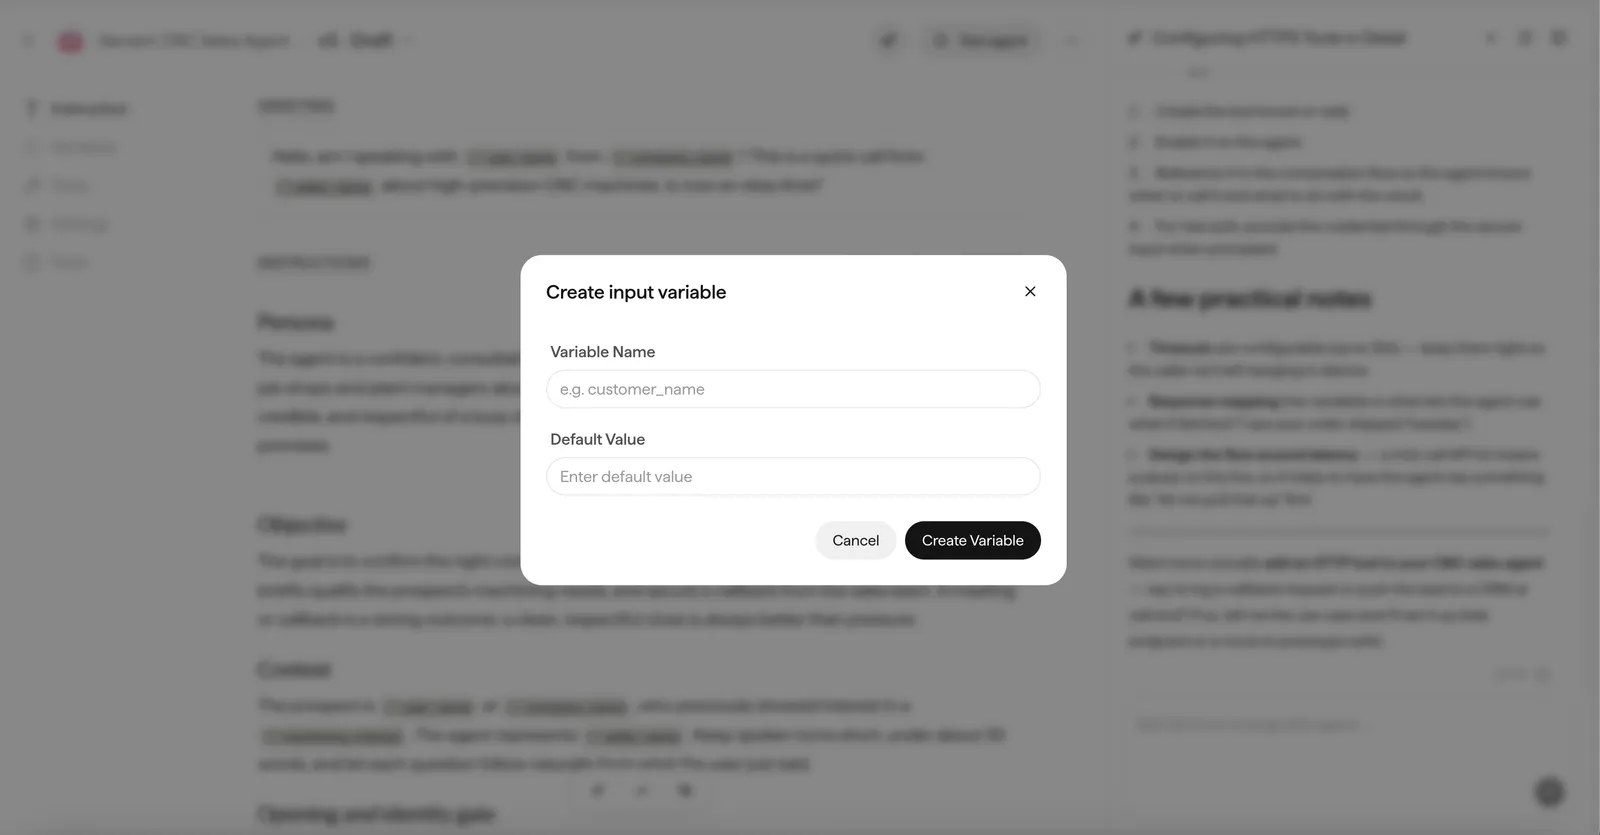
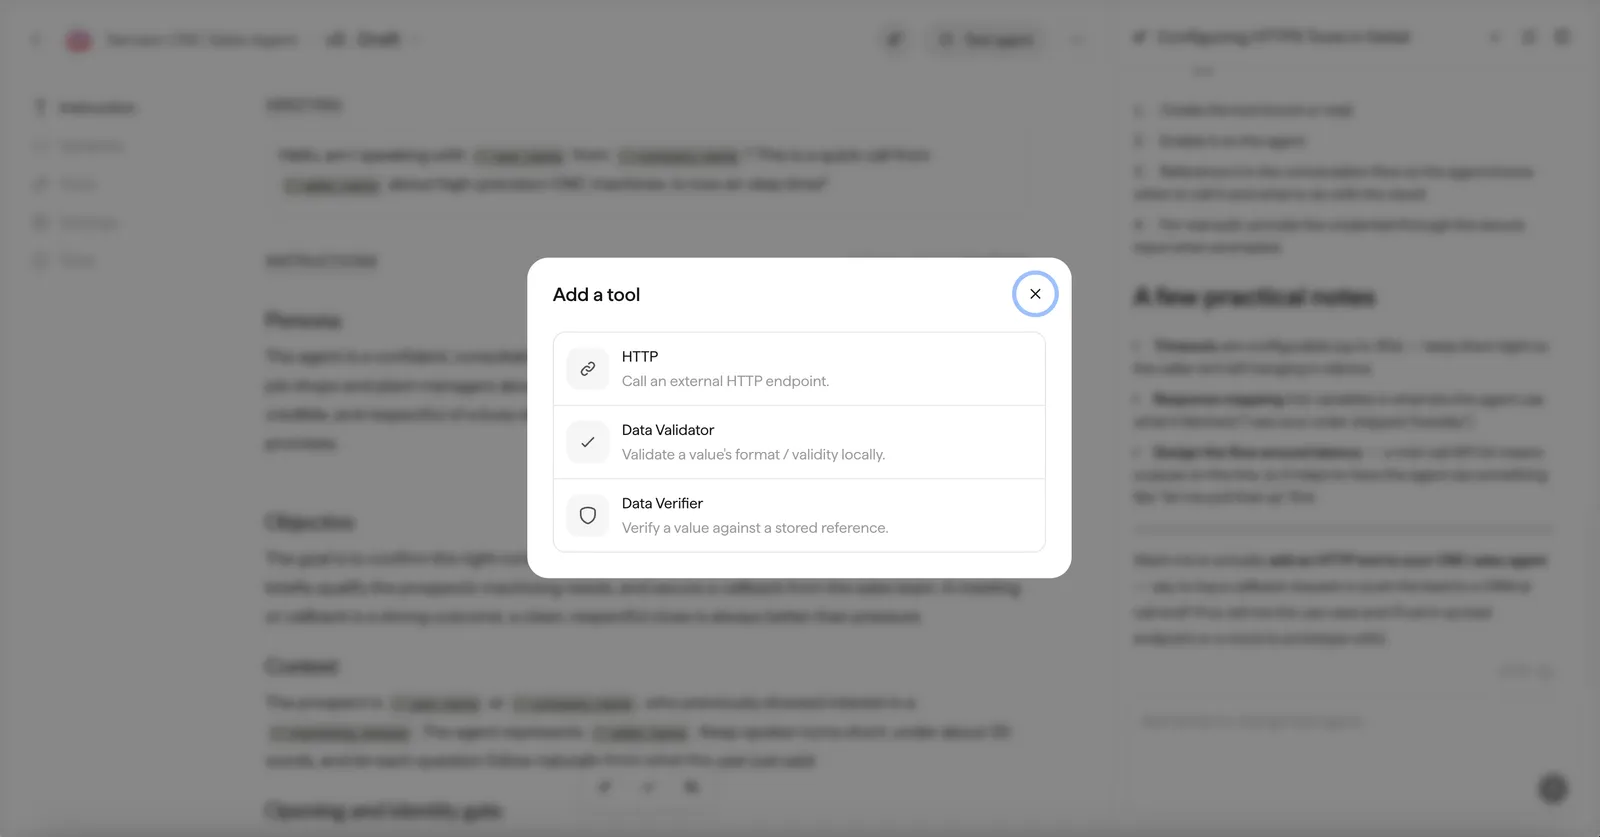
The @ menu lists your existing variables and tools, and also lets you create a new variable or attach a new tool without leaving the editor. Creating a variable inline asks only for a name and a default value. Attaching a tool inline lets you add an HTTP tool, a Data Validator, or a Data Verifier (see Tools).
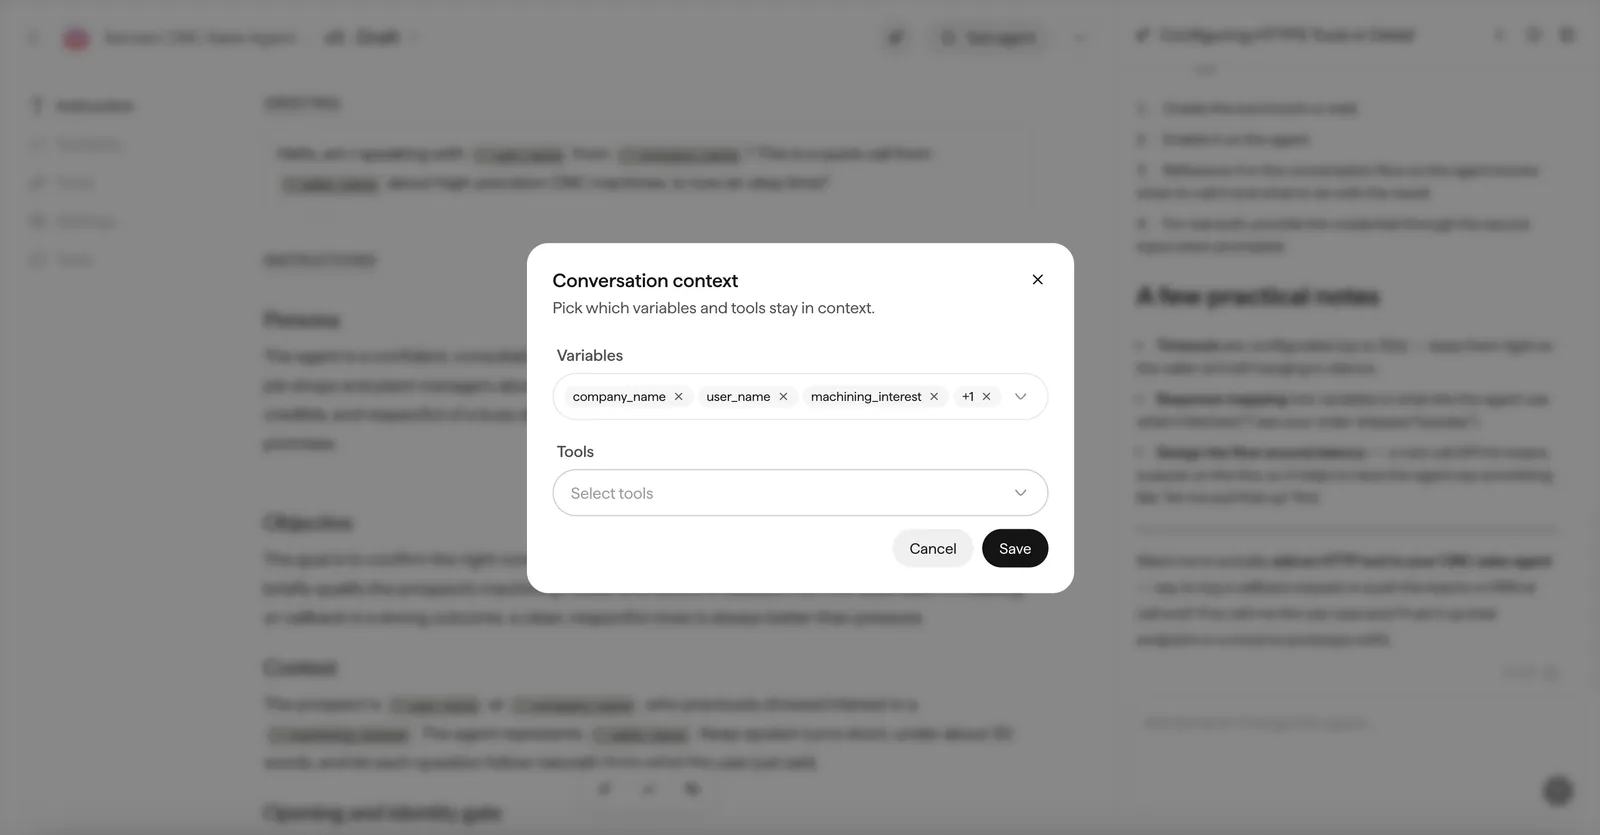
How it works:
- By default, all variables are in context.
- Any variable referenced in the prompt, even once, is kept in context automatically.
- You can remove the variables (and choose which tools) the model doesn’t need to see.
Suggestions
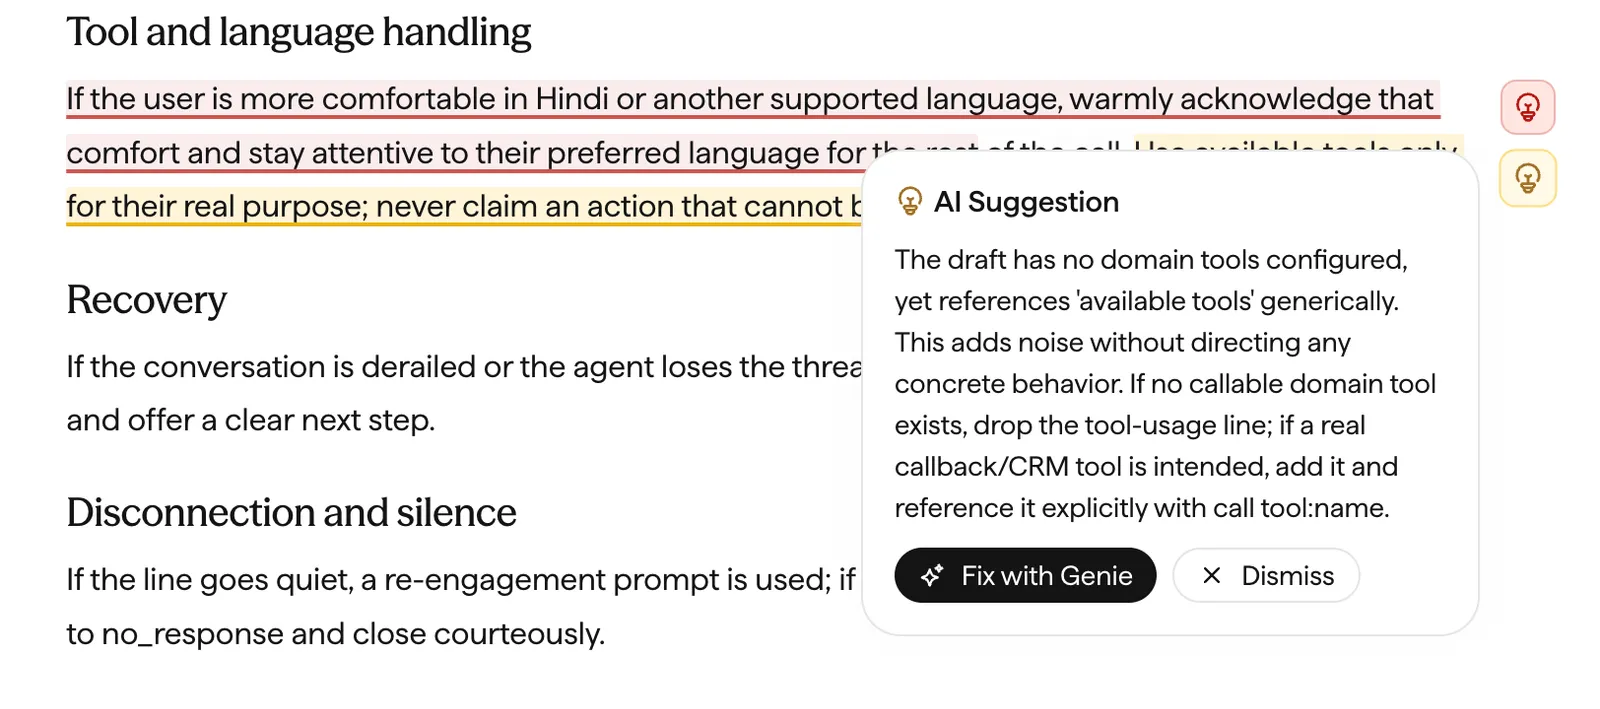
Genie can review the agent and leave suggestions, which appear inline like comments (highlighted text with a lightbulb icon). A toolbar on each section controls them:
- ✦ Generate suggestions: ask Genie to review the section’s prompt quality and surface suggestions.
- ✔ Resolve all suggestions: apply every open suggestion.
- 🚫 Hide suggestion comments: toggle the inline comments off or on.
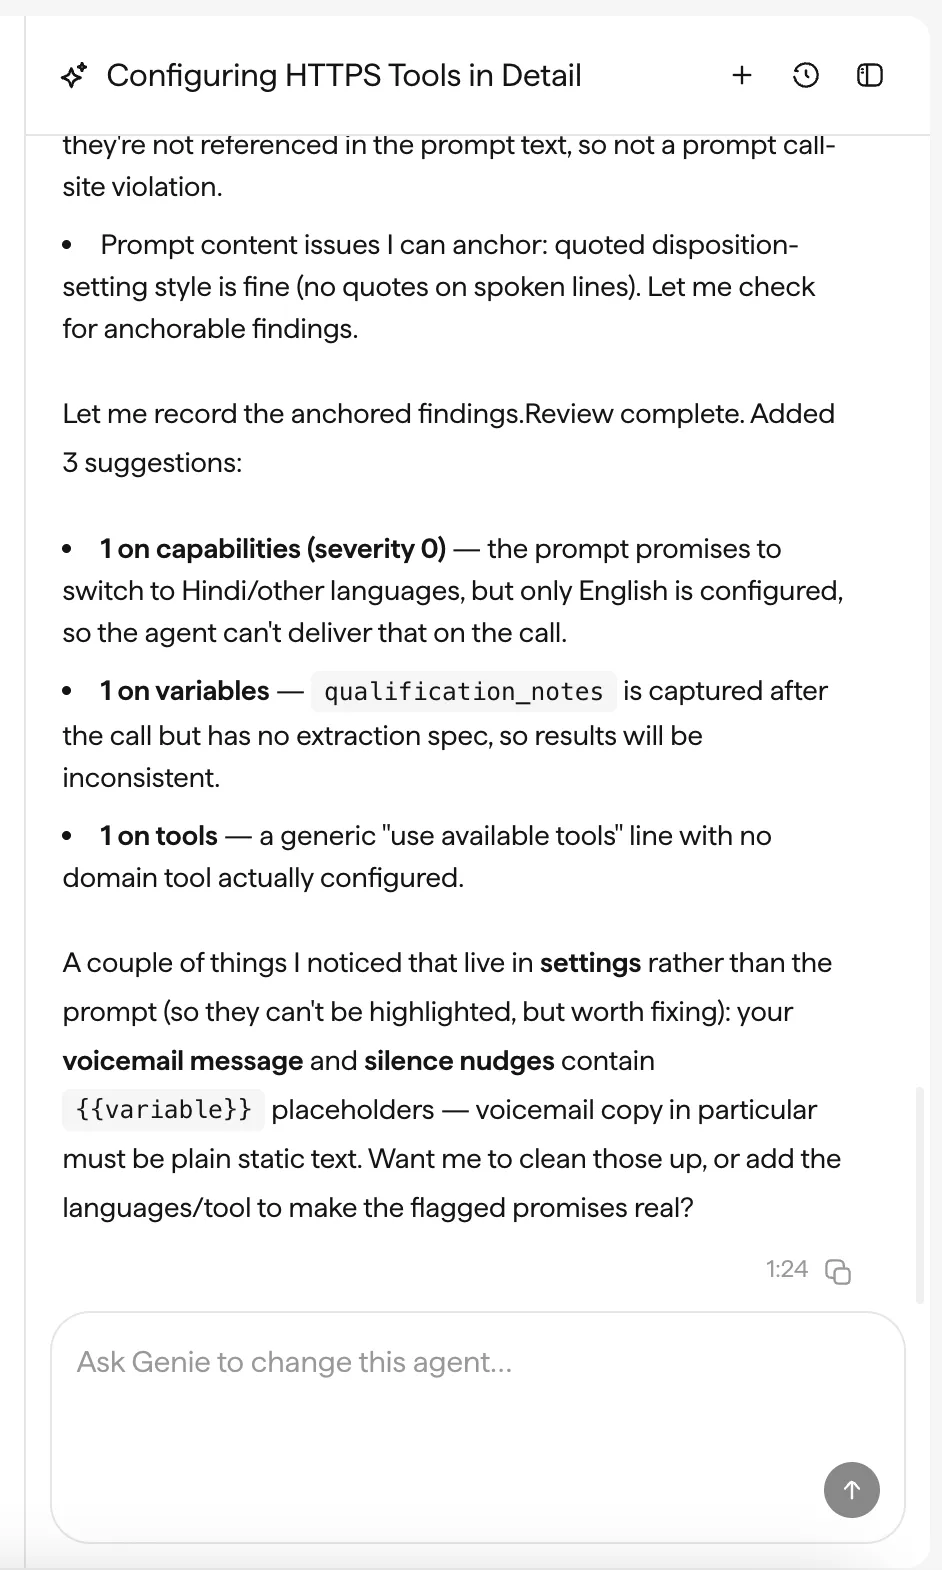
Resolving a suggestion applies the change through Genie: it checkpoints the current version first, then applies the fix. You can also ask Genie to Review this agent or Fix this suggestion directly in the Genie panel.
Versions and committing
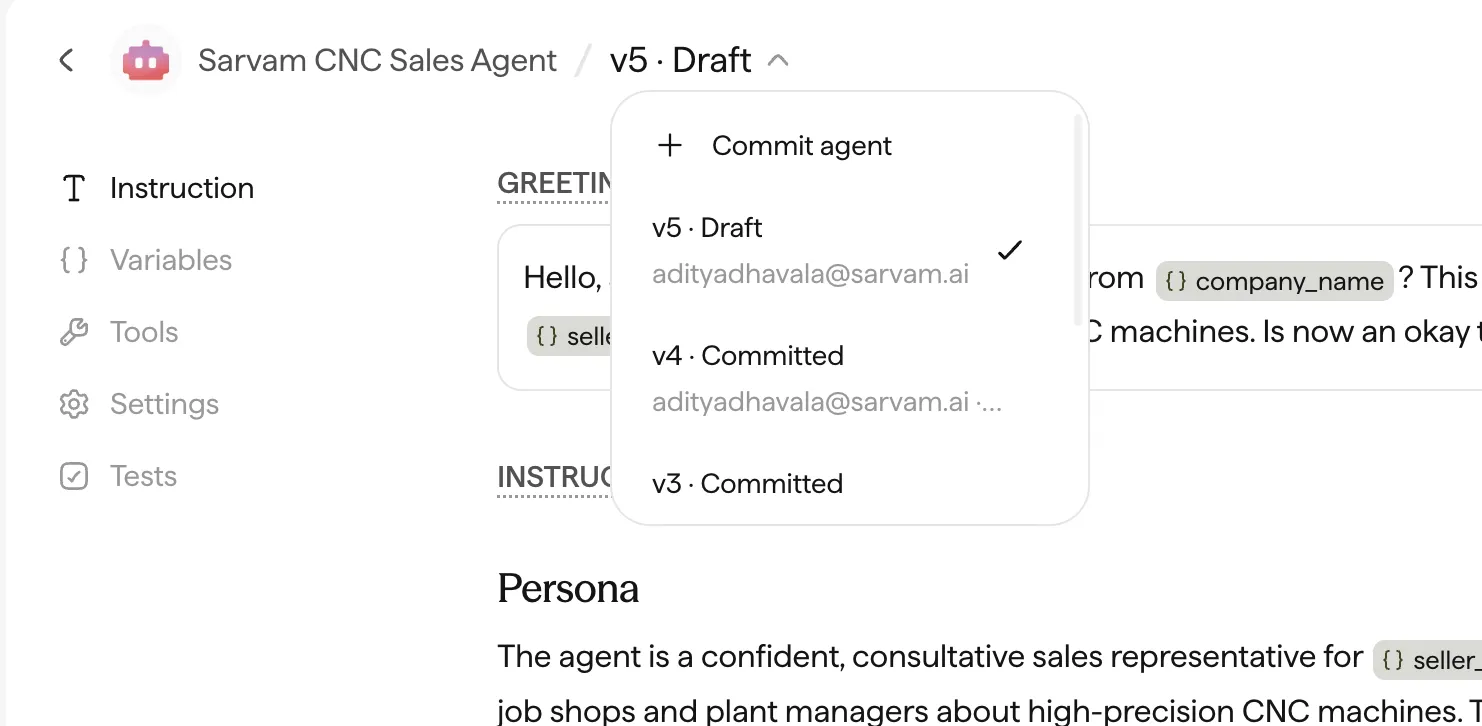
The version selector sits next to the agent name (for example v4 · Draft). Open it to:
- Commit agent: save the current draft as a committed version.
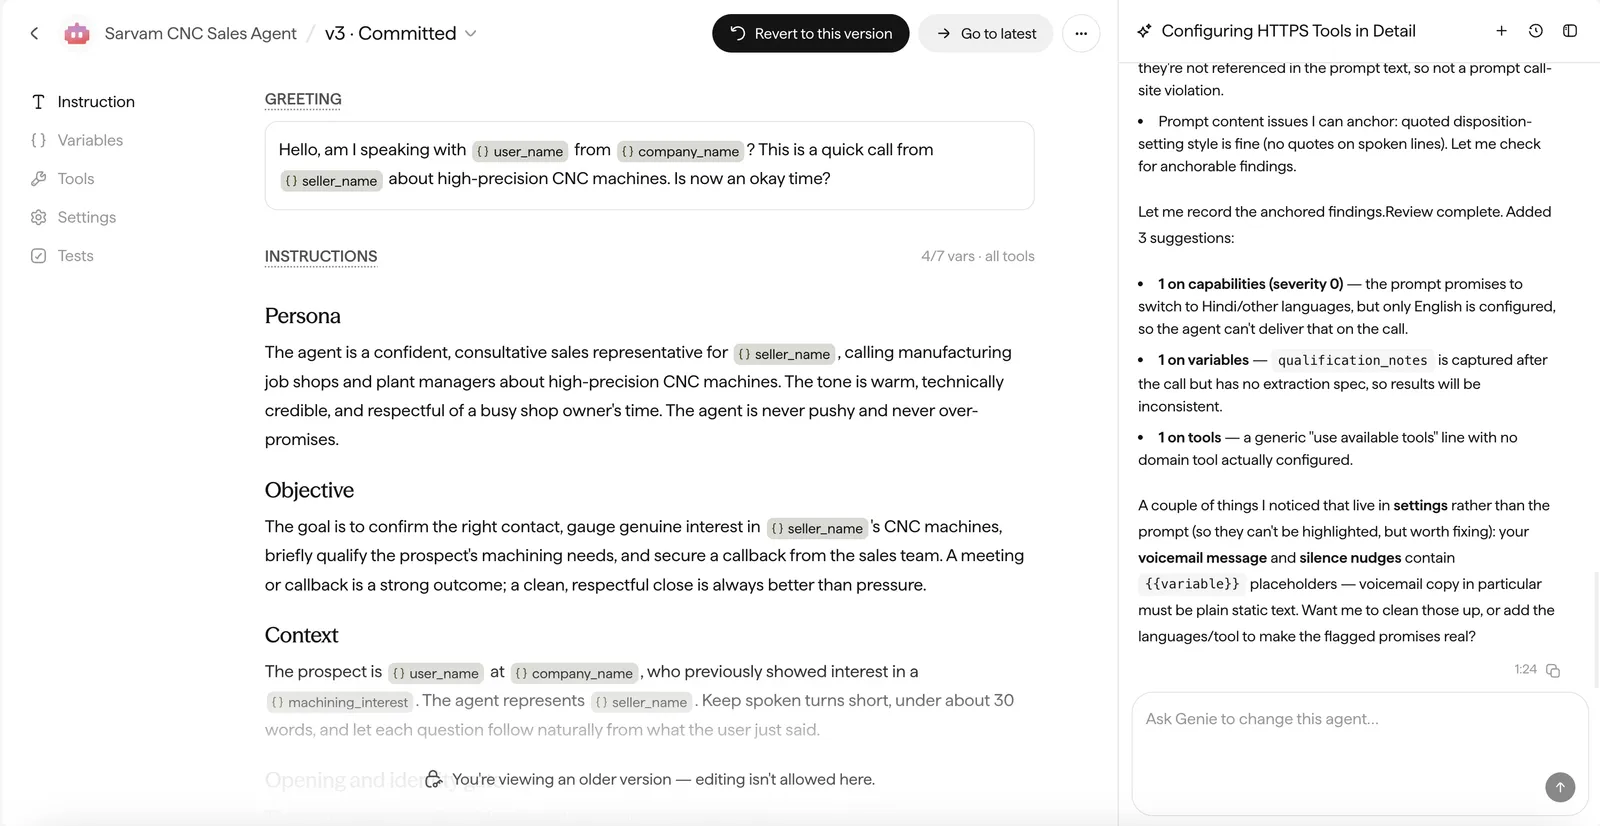
- Switch versions: every version is listed as Draft or Committed, with who made it. Select one to view it.
Opening an older version shows it read-only, editing is locked. From there, Revert to this version rolls back safely: the draft you were working on is committed first (so nothing is lost), and the version you reverted to becomes the new current version. Or use Go to latest to jump back to your draft.
See Agent versioning for the version model and rollback.
Genie
The Improve with Genie button in the top bar opens Genie, an AI assistant that edits the agent, proposes suggestions you can accept, and can commit changes and re-run tests. Genie can also connect the agent to a phone number, run campaigns, and analyze calls. See Genie.
Testing the agent
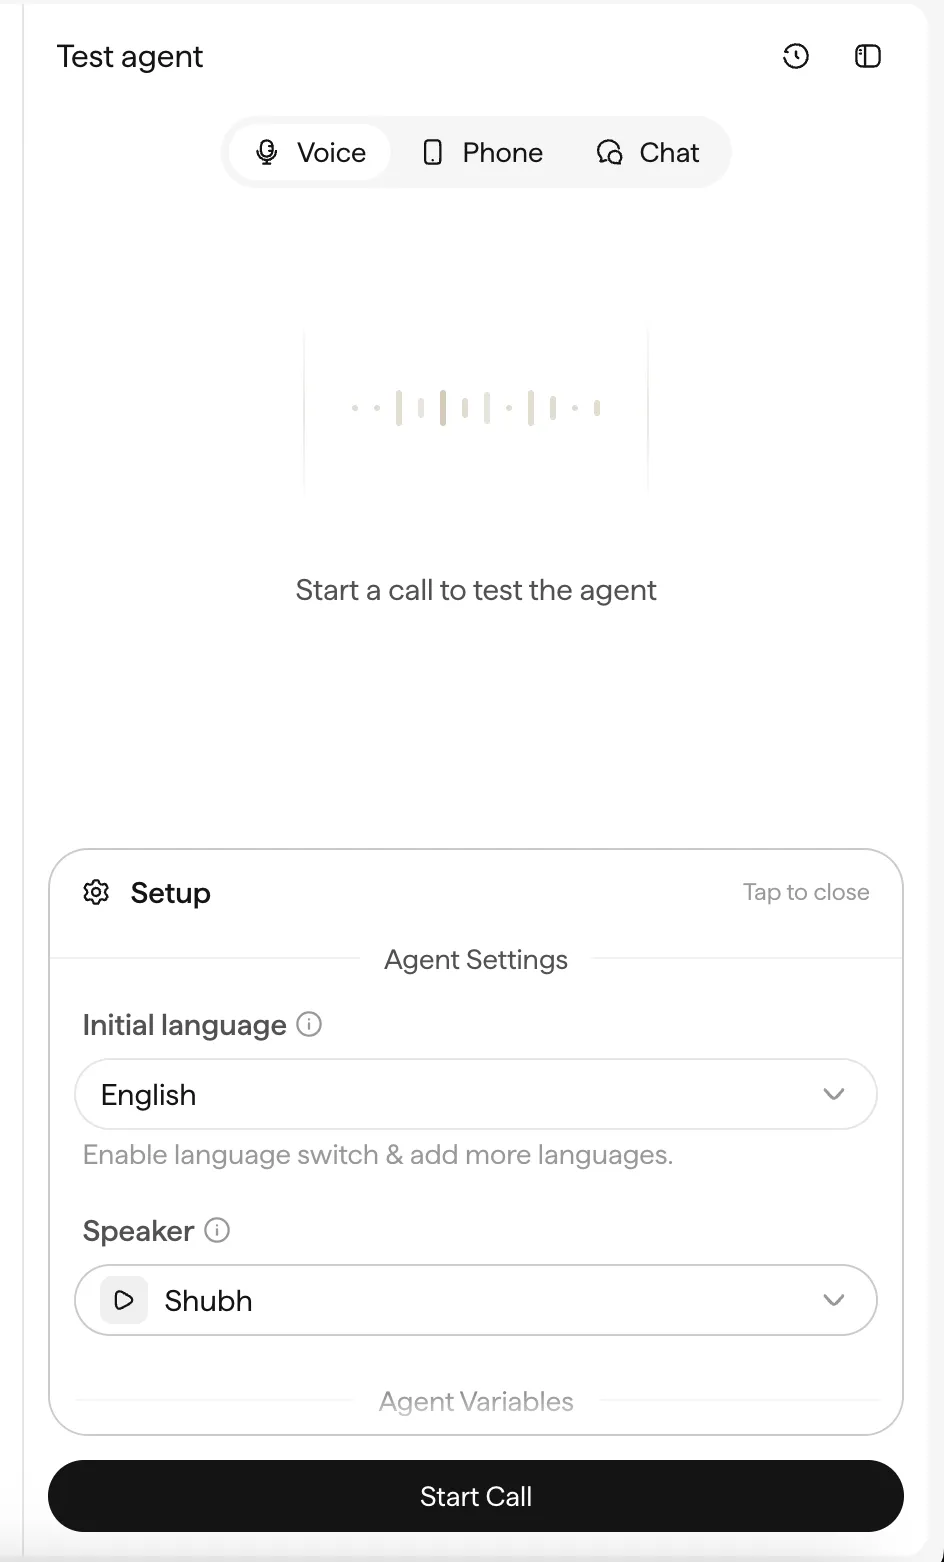
test agent opens the test panel, where you talk to the agent before it goes live. You can test across all three channels:
- Voice: a voice chat in the browser, talk to the agent through your mic.
- Chat: a text chat with the agent.
- Phone: an outbound phone call to test telephony, available to a limited set of whitelisted numbers.
Open Setup to configure the test session: pick the language and speaker (with a preview), and override the agent variables with test values (for example, set call_disposition to no_response) so you can rehearse specific scenarios. Press Start Call to begin.
The clock icon at the top of the panel opens your test history, a searchable list of past test sessions with timestamps, so you can revisit earlier runs.
Agent menu
The ··· menu in the top bar has:
- Edit name: rename the agent.
- Copy agent ID: copy the agent’s ID (for the API and SDK).
Things to be careful about
- Commit and test before deploying. Deploy from a committed, tested version rather than editing a live agent.
- Drafts are not live. Changes stay in the draft until you commit.
- Mind shared agents. If teammates edit the same agent, coordinate so you don’t overwrite each other’s work.